Cloudflare
Cloudflare's global network security solutions are designed to secure and optimize your cloud data, covering everything from websites and APIs to remote devices and storage. Use Cloudflare to complement your IDrive® e2 public buckets' network security and performance.
Sections in this article:
Configure IDrive® e2 bucket
To use Cloudflare's free CDN,
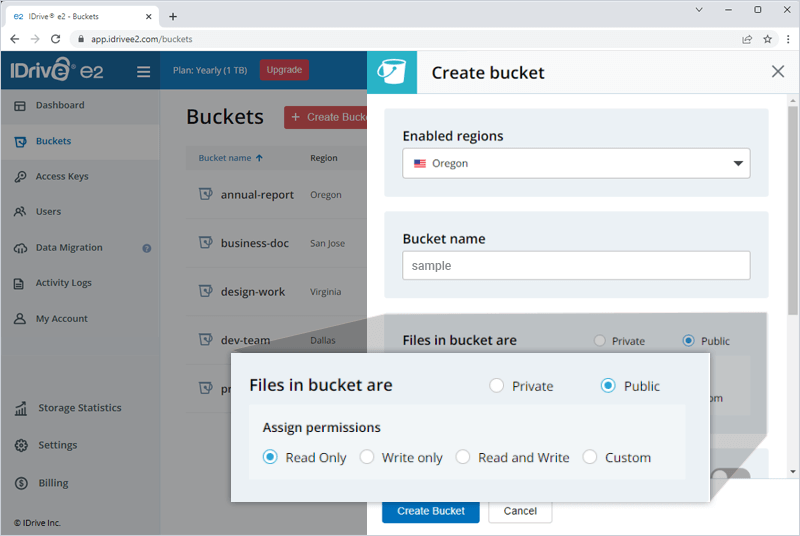
- Enable a region of your choosing and create a bucket with public access.
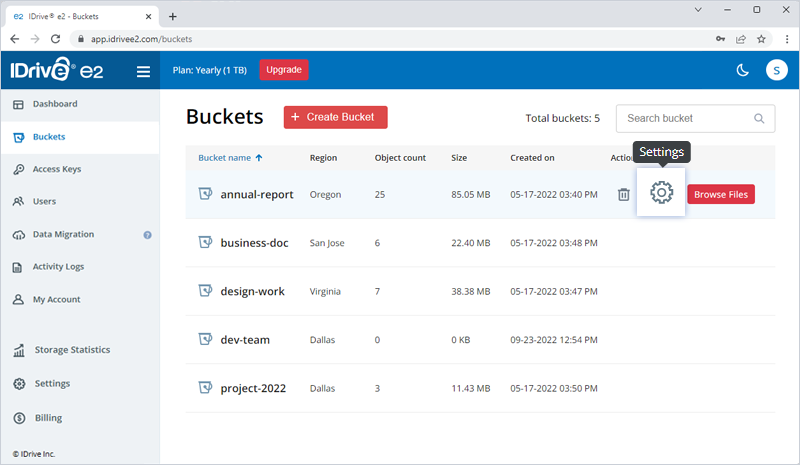
- Once the bucket is created, go to the Buckets tab and click
 corresponding to the newly created public bucket. The Bucket summary slider is displayed.
- Copy to the public domain name.
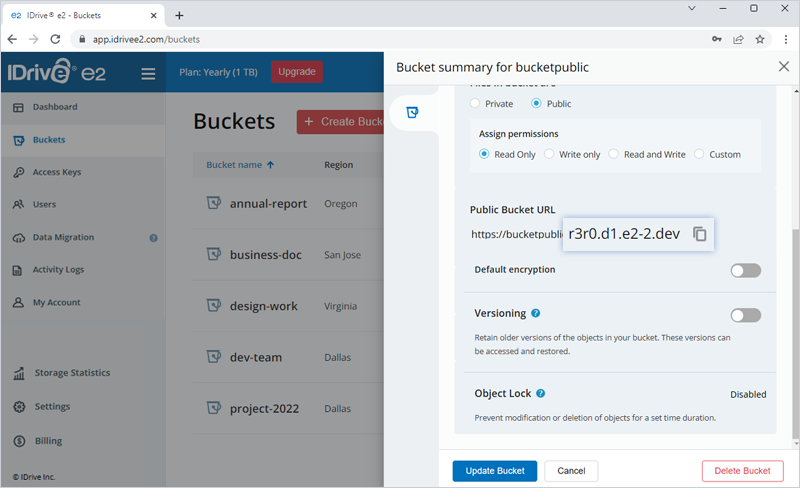
- Add a file to your bucket and check your file with the following URL once your bucket is public:
https://>iDrivePublicEndpoint>/path/to/file
Set up and configure Cloudflare
Create a Cloudflare account
- Create a Cloudflare account, and add your domain name. Cloudflare will look up DNS records and pop up some results.
- Confirm if the DNS record is active, and get your Cloudflare nameservers for your domain.
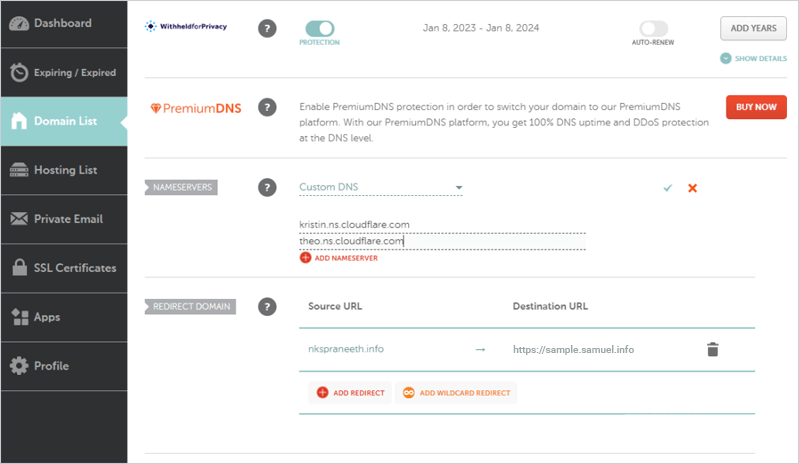
- In your domain registrar account, replace the existing nameservers with the Cloudflare nameserver, and confirm the activation status.
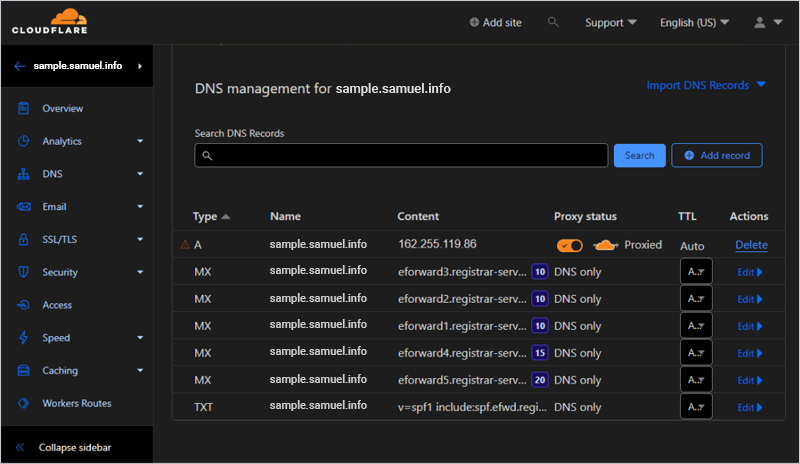
- Go to the DNS tab in Cloudflare and add a wildcard CNAME record pointing to your IDrive® e2 endpoint. You will have a CNAME record for *.your-domain.com pointing to your IDrive® e2 public endpoint region that was enabled earlier.
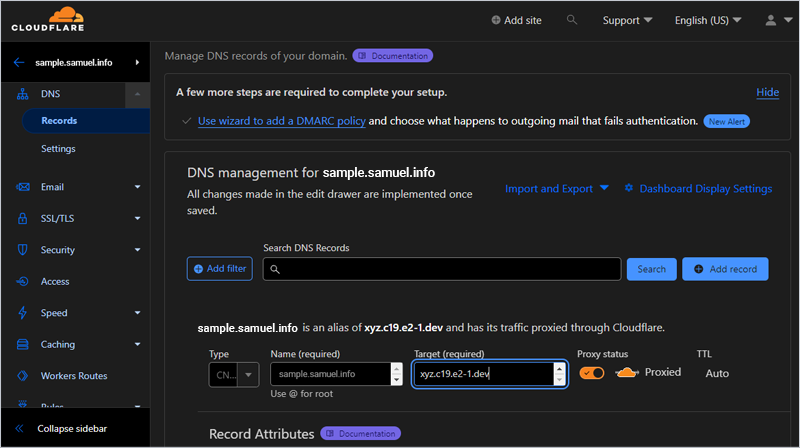
Note: To add the root level domain use @ as a name.
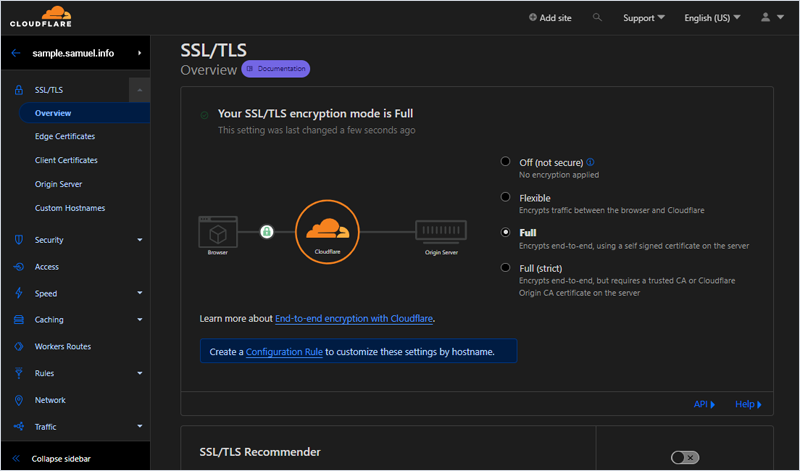
- Go to SSL/TLS > Overview and choose the Full SSL/TLS encryption mode.
- Go to the SSL/TLS tab > Origin Server and click Create Certificate.
Enter two domain names, for example,
samuel.info & *.samuel.info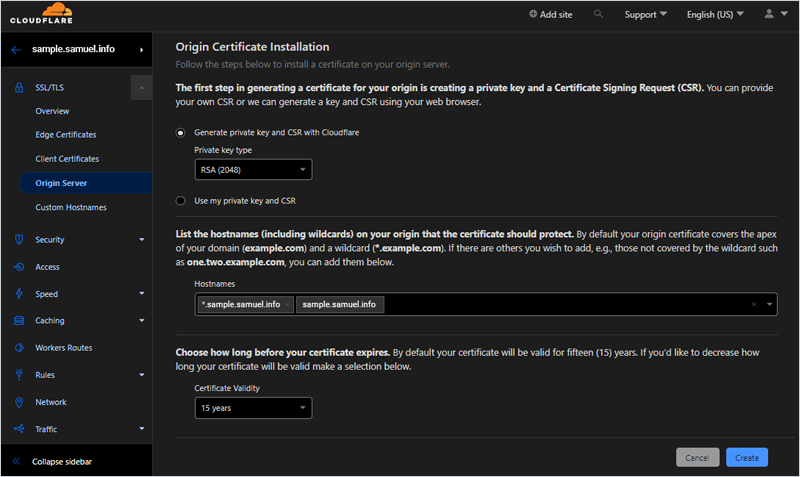
Note: You will need to have both the root domain and wildcard domain added.
You will be presented with the Origin Certificate and a Private Key.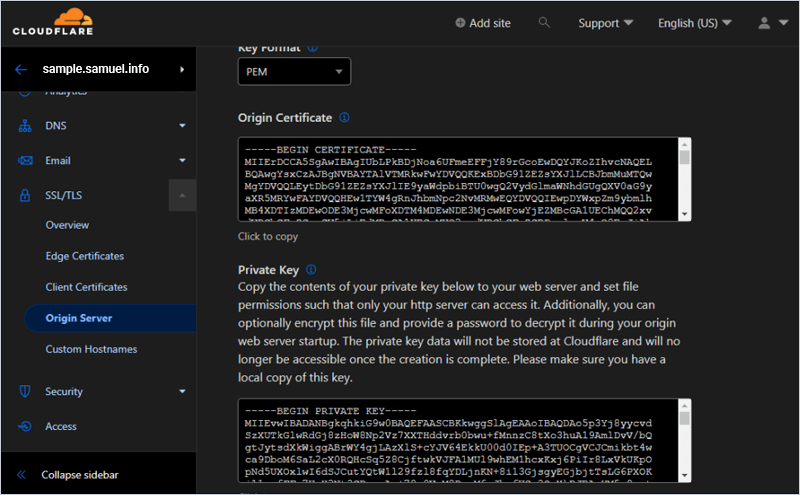
- Click OK.
- Enable the toggle under Authenticated Origin Pulls.
Note the Origin certificate and the private key for further reference.
Add CNAME in IDrive® e2
- Sign in to your IDrive® e2 account.
- Under Dashboard > Enabled regions, click corresponding to the region you enabled earlier.
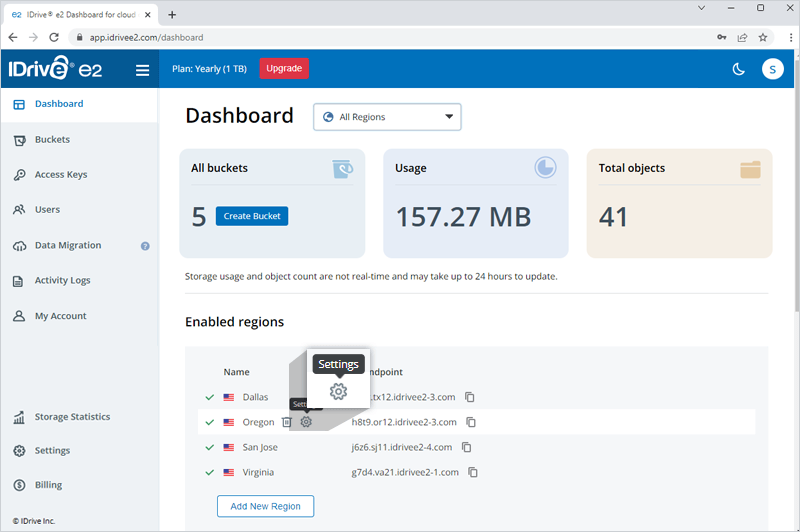
- Click Add CNAME. Fill the fields as given below and click Add.
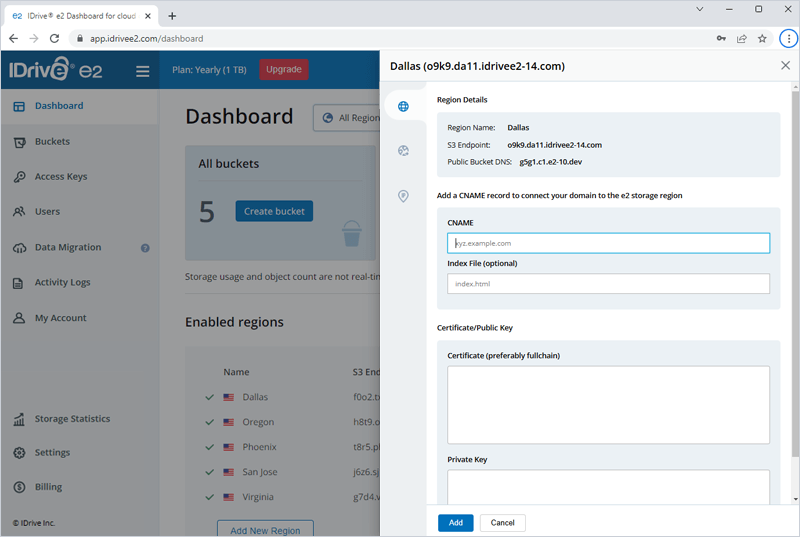
- For CNAME use your wildcard domain.
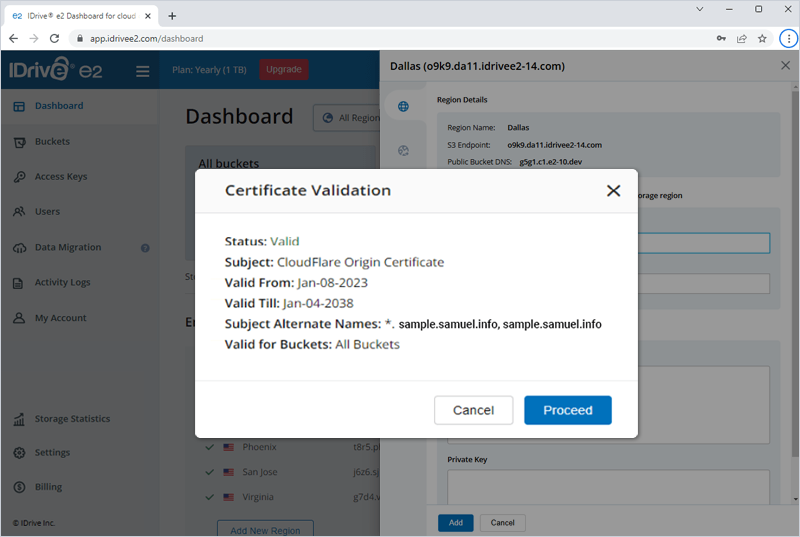
For example, *.samuel.info - For the TLS certificate, use the certificate and the private key which were generated in Cloudflare earlier.
Note: The addition of CNAME may take a while, and several attempts depending on DNS.
- For CNAME use your wildcard domain.