Oracle Server Backup
Oracle Server Backup
Automated offsite backups protect your organization’s Oracle databases with secure, encrypted data transfers. The Oracle database backup feature enables you to backup Oracle databases directly to your IDrive account without disrupting active database operations or interrupting services.
Features
- Authentication of the Oracle database for backup.
- Provision to backup the Oracle database without interrupting the running Oracle server services.
- Provision to report the progress of backup jobs.
- Ability to schedule backups for a future date and time with various scheduling options.
- Provision to avail notifications (Email and Desktop) upon completion of scheduled backup jobs.
- Provision to generate log files for each backup session.
- Enhanced security as data is transferred and stored using 256-bit AES encryption with a user-defined key that is not stored anywhere on the IDrive servers.
Requirements for backup
Following are the prerequisites for Oracle database backup:
- Install the IDrive application on the computer where the Oracle instance is available.
- Ensure there is sufficient disk space for database backup and restore.
- The database must be running in ARCHIVELOG mode.
- The database must be in OPEN state.
- The user must have SYSDBA privilege to initiate backup.
- Oracle Recovery Manager (RMAN) must be available on the computer where the IDrive for Windows application has been installed.
Enabling ARCHIVELOG Mode
To enable ARCHIVELOG mode using Oracle Recovery Manager (RMAN):
- RMAN> connect target <username> / <PWD>@<SID > [connect to your Oracle database];
- RMAN> connect target <username>/<password>@<service name>;
- RMAN> shutdown immediate;
- RMAN> startup mount;
- RMAN> alter database archivelog;
- RMAN> alter database open;
Procedure to Initiate Oracle Database Backup
To backup your Oracle server,
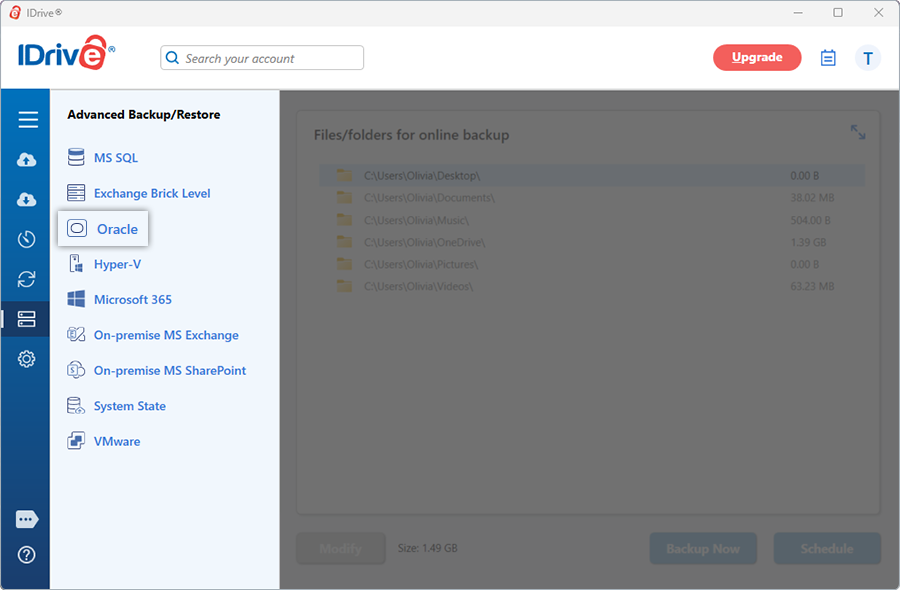
- Sign in to the IDrive application and click ‘Server Backup’. A slider menu will appear. Select ‘Oracle’.
- The Oracle Connection screen appears. By default, the Oracle Backup tab is selected.
- Provide the Oracle Instance authentication information when prompted. Enter the Host String in the EZCONNECT format:
<host name>:<port name>/<service name>
For e.g. 192.168.1.245:1521/ORCL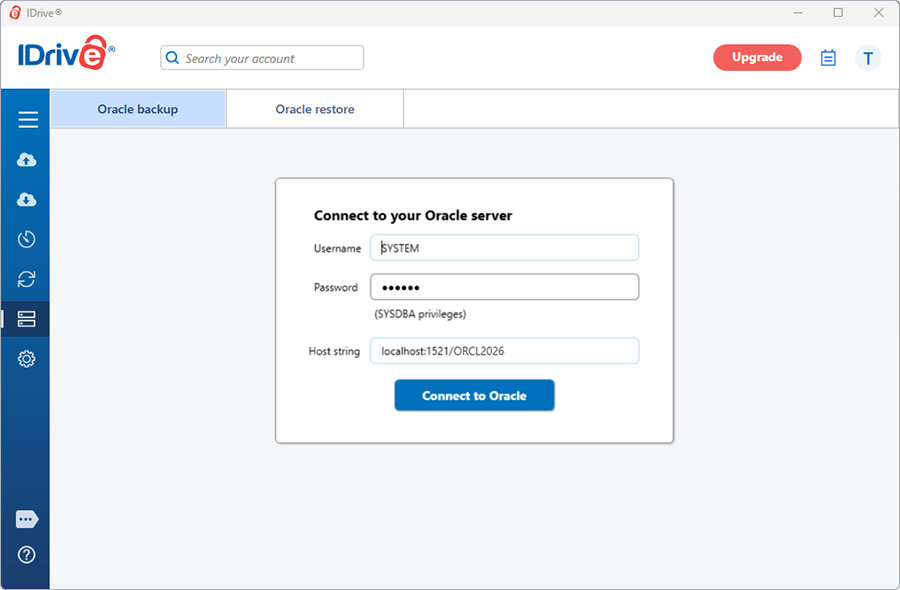
Click ‘Connect to Oracle’.
NOTE: Ensure that the user has SYSDBA privileges.
- Select 'Online Backup', or 'Local Backup', or 'IDrive Express™ Backup'.
Note: On selecting 'Online Backup’, the data will be stored on the IDrive cloud whereas on selecting 'Local Backup', or 'IDrive Express™ Backup' the data will be stored on the local drive.
- Select the Container Database (CDB) and specify a temporary path for the local backup.
Note: Ensure that the selected temporary directory path on the local computer has sufficient disk space to hold the Oracle server backup resources. Also, select the temporary location on the computer where the Oracle Instance is running.
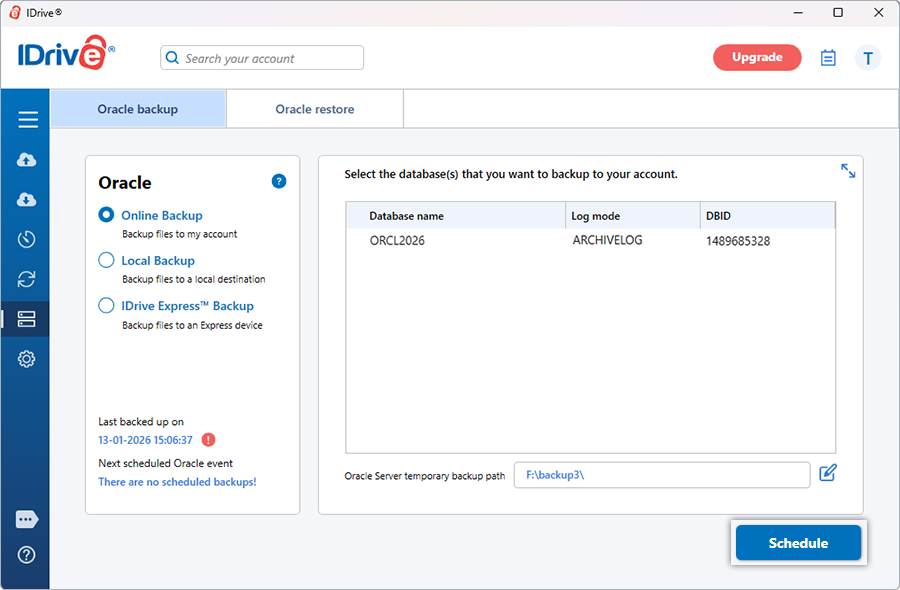
- Click 'Schedule'. The 'Scheduler' is displayed where you can schedule the backup for any future day and time or perform an immediate backup of the selected Container Database.

NOTE: For an easy identification of the Oracle backup set, the name of the backup set will begin with ‘IDORACLEBkset’ followed by the Database Host String and backup type.
For e.g. if the host string is 192.168.1.235:1521, then the name of the backup job will be IDORACLEBkset(192.168.1.235:1521_DB)[Local].
You may consult your Oracle Database Administrator for details on the configuration parameters.
View the steps to restore the Oracle Server.