I have virtual machines running on ESXi hosts and vCenter servers. Can I backup these VMs to the IDrive BMR device?
Yes, you can backup virtual machines running on ESXi host and vCenter server to the IDrive BMR device. Connect to the required ESXi hosts and vCenter servers, select the VMs to be added to the IDrive BMR device, and schedule the backup. The initial backup is a full image backup and subsequent backups are full or incremental as per the schedule.
Can I select virtual disks at VM level for the backups?
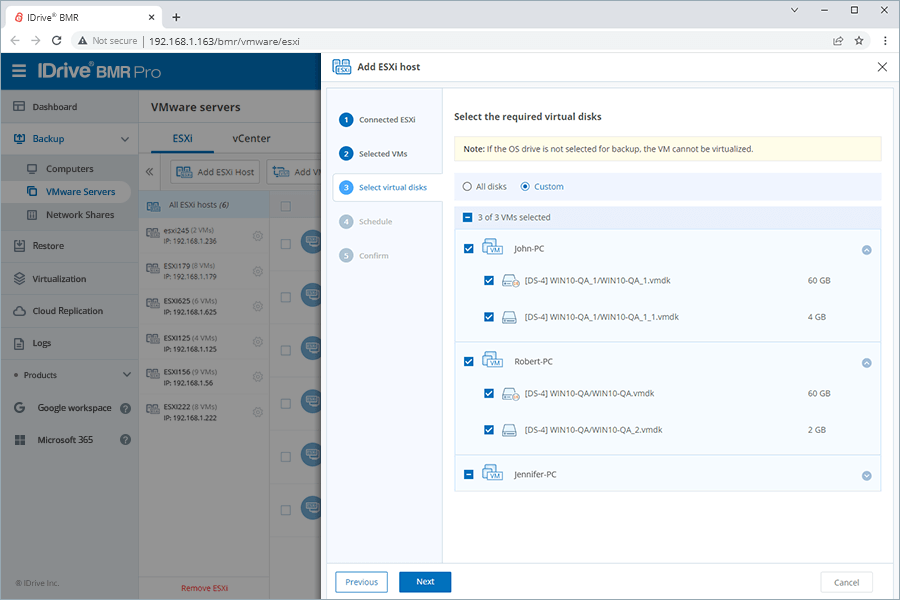
Yes, when adding VMs from your ESXi host/vCenter server to the IDrive BMR device for backup, you can select specific virtual disks at the VM level. This enables efficient use of storage space and faster backup processes, as only the necessary disks are backed-up to the IDrive BMR device.
Note: A mandatory forced full backup is required to ensure that the latest disk selection changes are reflected during the restore and virtualization process.
How do I backup VMs running on ESXi host and vCenter server to the IDrive BMR device?
You need to add the required VMs on the ESXi host/vCenter server to the IDrive BMR device for backup.
To add VMs from ESXi host to the IDrive BMR device,
Connect to the IDrive BMR device interface.
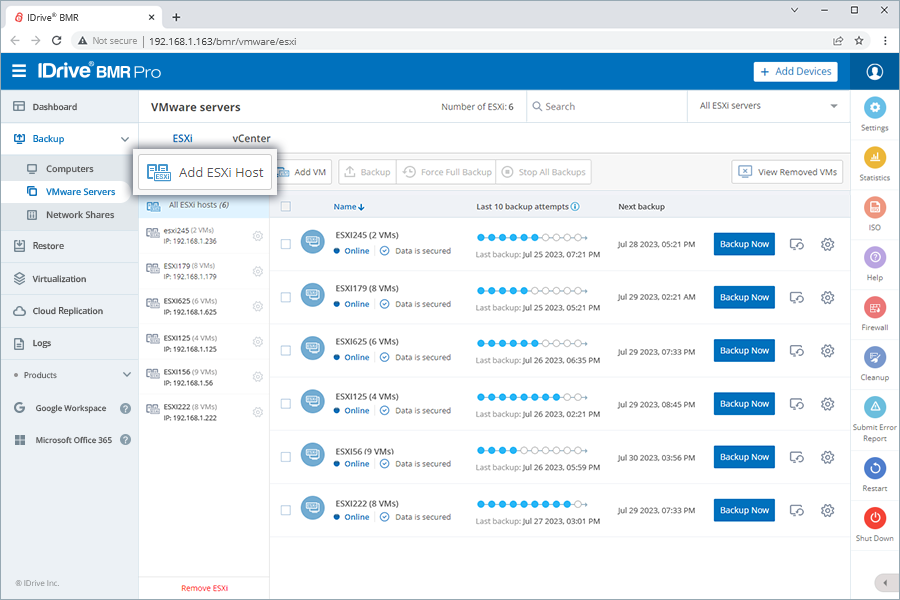
Go to Backup > VMware Servers > ESXi.
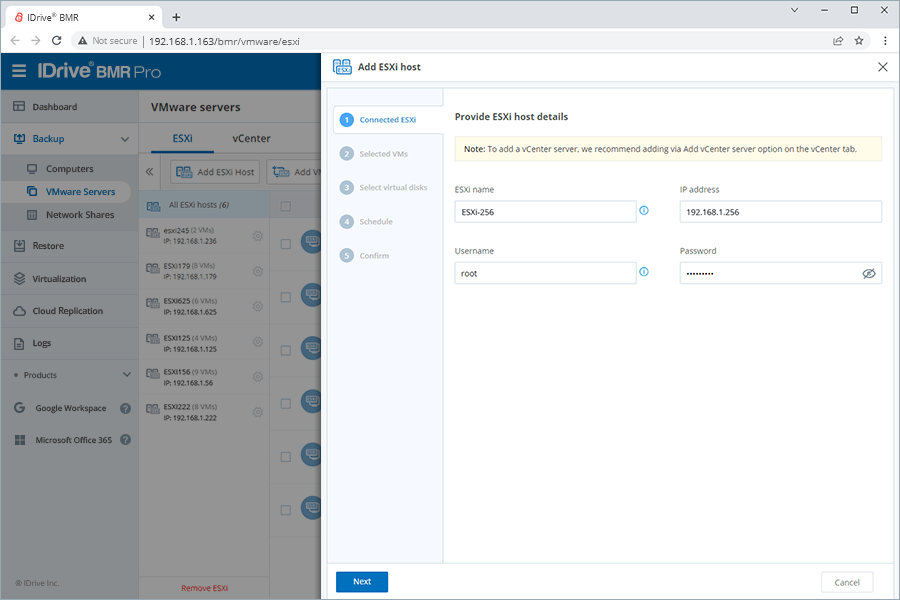
Click Add ESXi Host. This will launch the Add ESXi host wizard.
Enter details such as ESXi name, IP address, username, and password, and click Next.
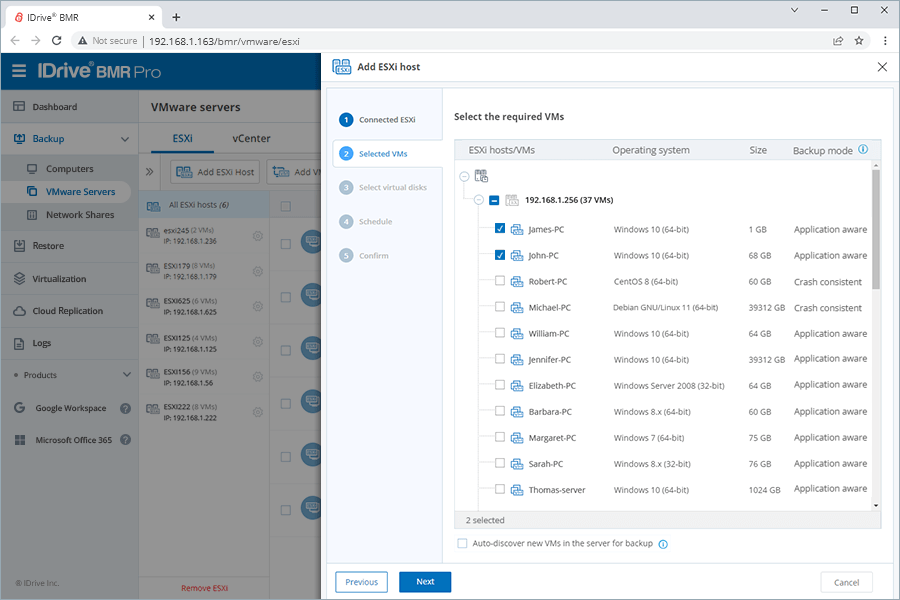
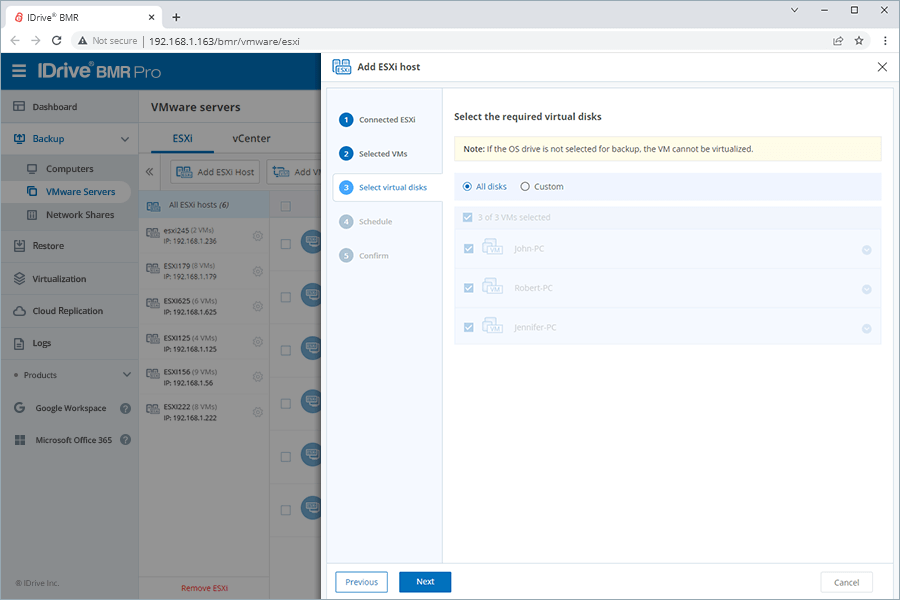
Select the virtual machines to be added.
Note: IDrive BMR follows VMware's naming conventions and restrictions for virtual machines. Hence names with the special characters colon, quotation marks, and slash (:, ", \, and /) are not supported.
Enable Auto-discover new VMs in the server for backup to automatically detect and include any newly added VMs in the IDrive BMR backup list.
Note: You can manually remove any VMs from the backup list via Settings.
Click Next.
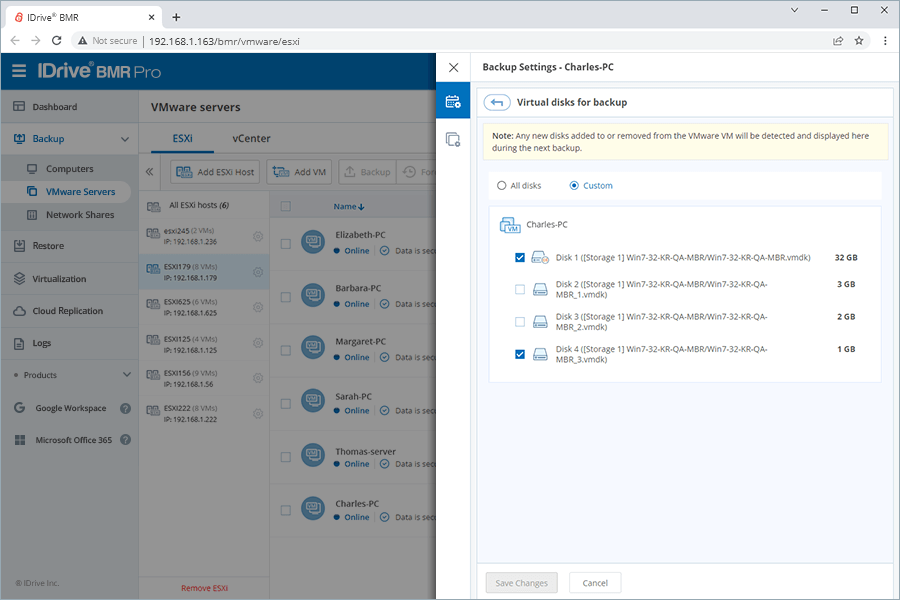
Choose the required virtual disks for backup. You can either select all disks associated with your system or customize the backup by choosing specific disks.
Note: Include the OS disk for backup to ensure VM system recovery. Typically, the first drive listed is the OS drive.
Click Next.
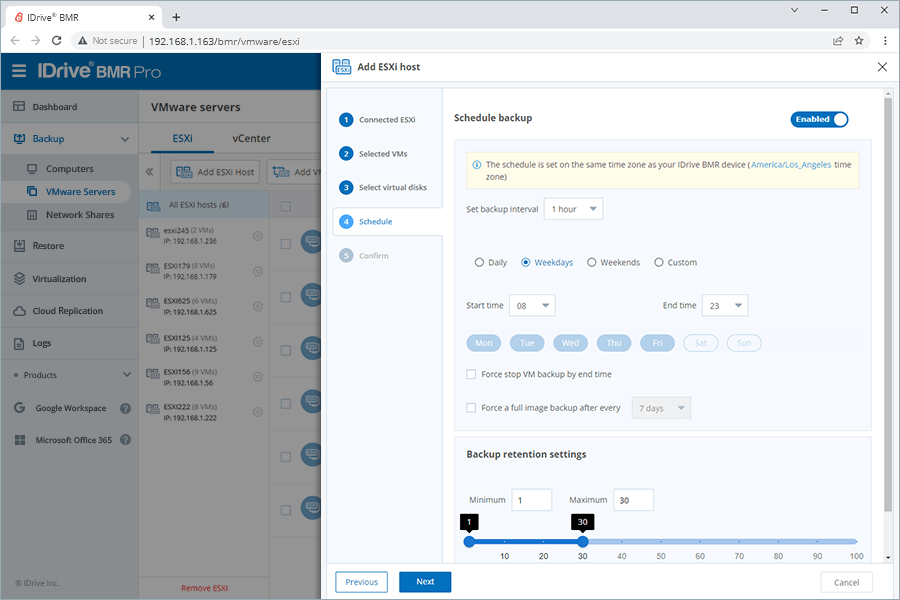
Set the backup schedule parameters and click Next.
Verify the details and click Confirm. The selected VMs will be added for backup as per the schedule.
To add VMs from vCenter server to the IDrive BMR device,
Connect to the IDrive BMR device interface.
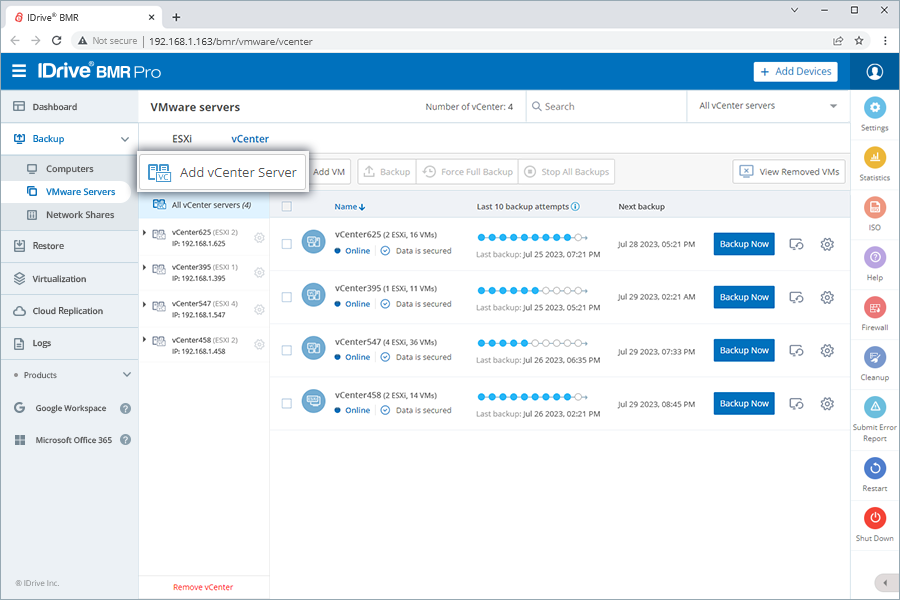
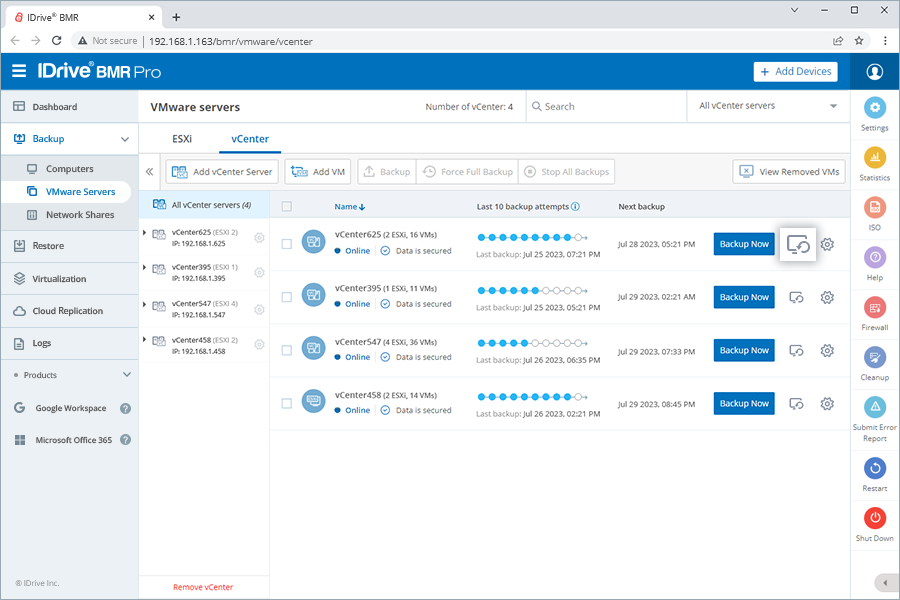
Click Backup > VMware Servers > vCenter.
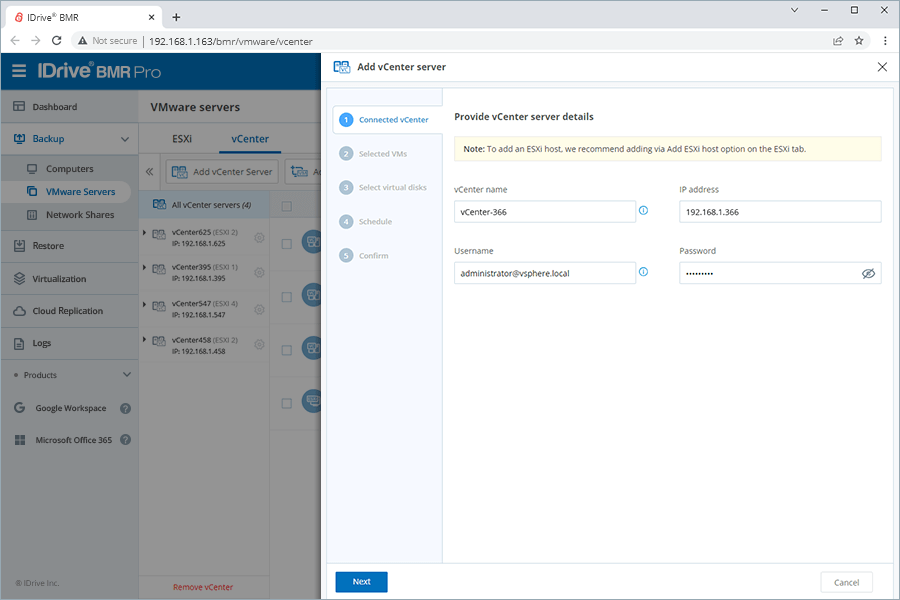
Click Add vCenter Server. This will launch the Add vCenter server wizard.
Provide details such as vCenter name, IP address, username, and password, and click Next.
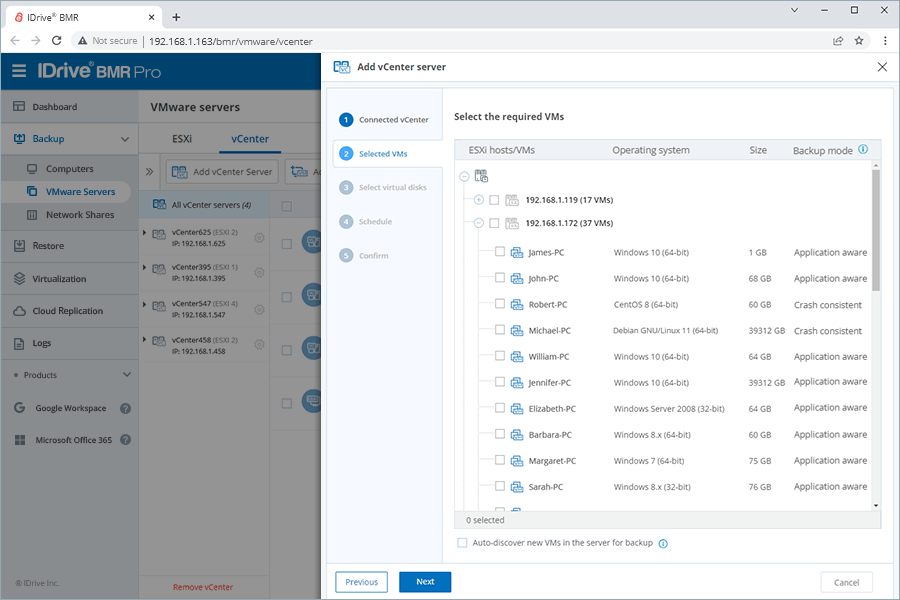
Select the required virtual machines.
Note: IDrive BMR follows VMware's naming conventions and restrictions for virtual machines. Hence names with the special characters colon, quotation marks, and slash (:, ", \, and /) are not supported.
Enable Auto-discover new VMs in the server for backup to automatically detect and include any newly added VMs in IDrive BMR the backup list.
Note: You can manually remove any VMs from the backup list via Settings.
Click Next.
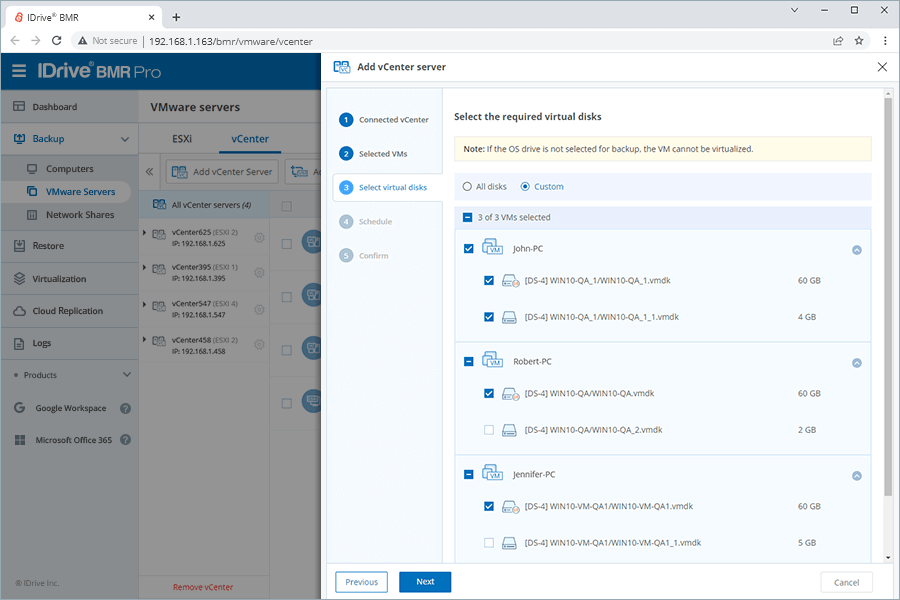
Choose the required virtual disks for backup. You can either select all disks associated with your system or customize the backup by choosing specific disks.
Note: Include the OS disk for backup to ensure VM system recovery. Typically, the first drive listed is the OS drive.
Click Next.
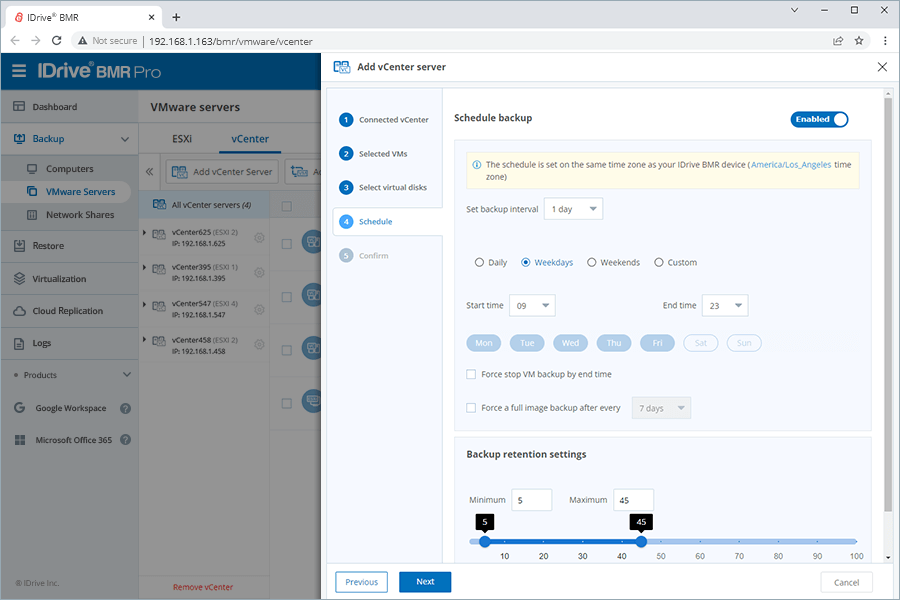
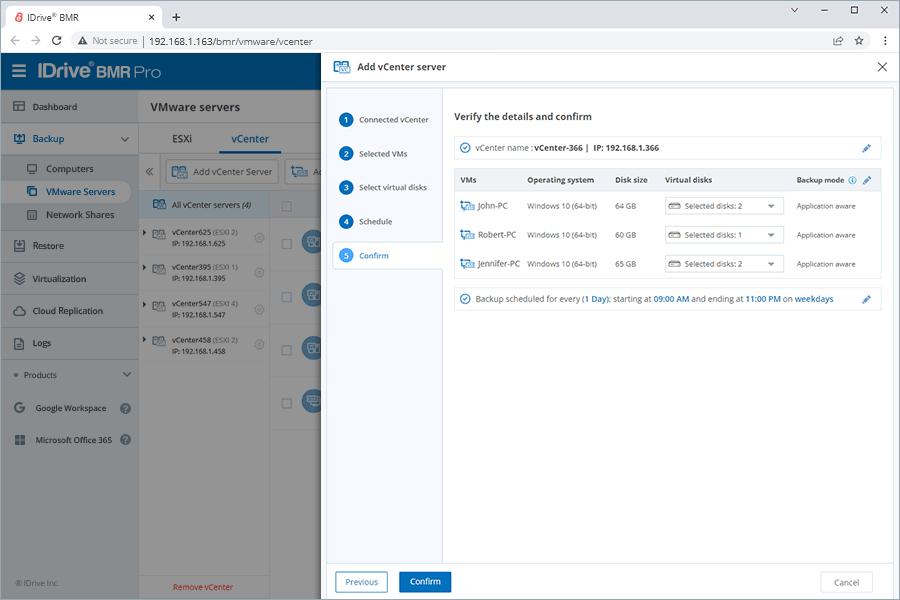
Set the backup schedule parameters and click Next.
Verify the details and click Confirm. The selected VMs will be added for backup as per the schedule.
I have added new VMs to my ESXi/vCenter. How do I add them for backup?
To add new VMs to the ESXi/vCenter,
Connect to the IDrive BMR device interface.
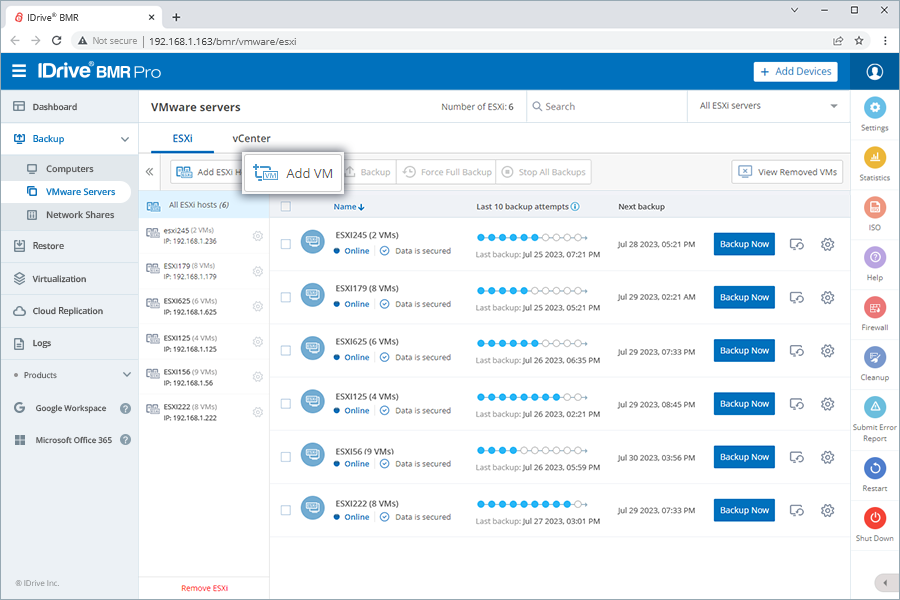
Go to Backup > VMware Servers.
Click Add VM under ESXi/vCenter.
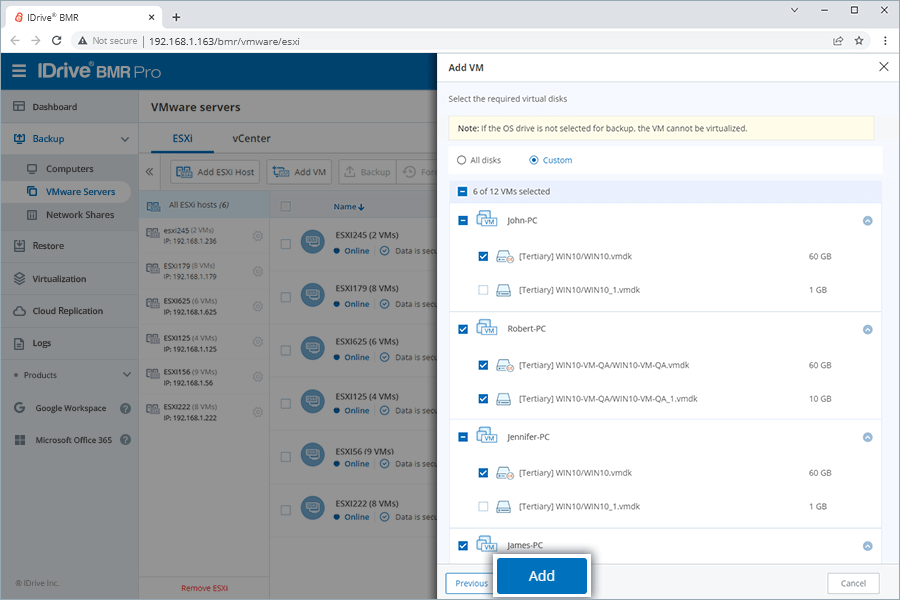
Select the VMs to be added.
Note: IDrive BMR follows VMware's naming conventions and restrictions for virtual machines. Hence names with the special characters colon, quotation marks, and slash (:, ", \, and /) are not supported.
Click Next.
Choose the required virtual disks for backup. You can either select all disks associated with your system or customize the backup by choosing specific disks.
Note: Include the OS disk for backup to ensure VM system recovery. Typically, the first drive listed is the OS drive.
Click Add.
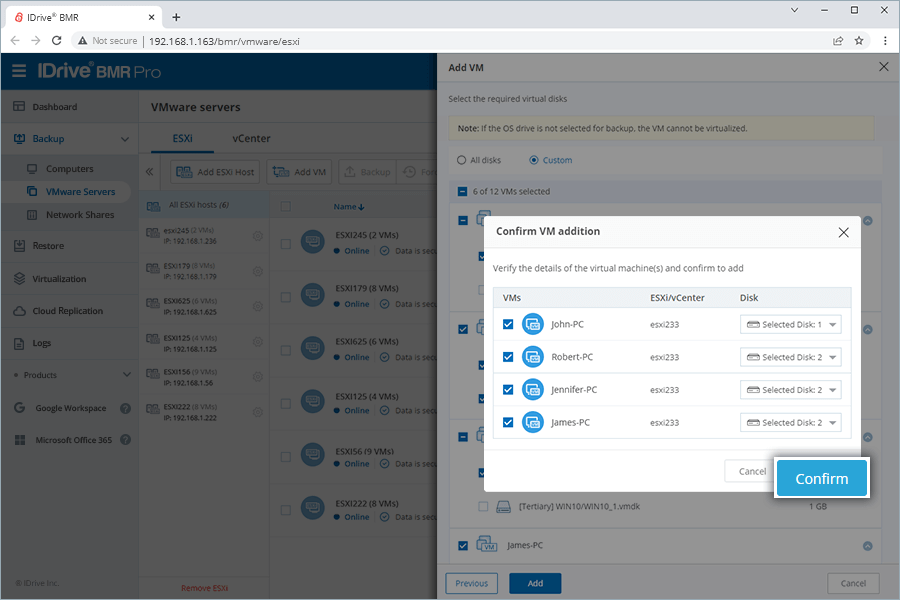
Verify the details of the virtual machines and click Confirm. The selected VMs will be added for backup as per the schedule.
Can I perform an immediate backup of the virtual machines running on ESXi/ vCenter?
Yes, you can perform an immediate backup of the virtual machines running on your ESXi host/ vCenter server.
To perform an immediate backup,
Connect to the IDrive BMR device interface.
Go to Backup > VMware Servers.
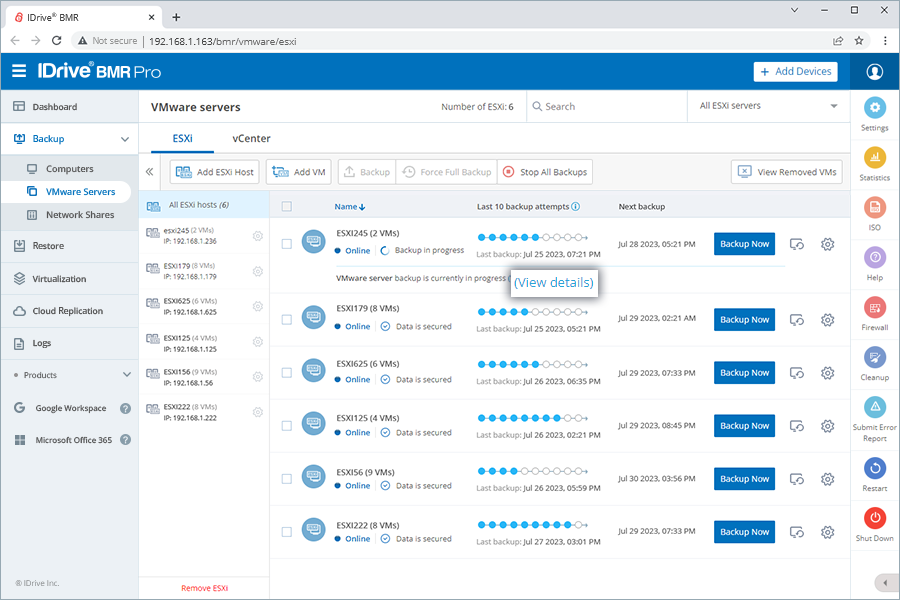
Click Backup Now corresponding to the VMware server under the respective ESXi/vCenter to initiate an immediate backup.
Click the View details link to track the backup progress.
Can I stop all ongoing VMware server backups?
Yes, you can stop all ongoing VMware server backups with a single click.
To stop the ongoing backups,
Connect to the IDrive BMR device interface.
Go to Backup > VMware servers.
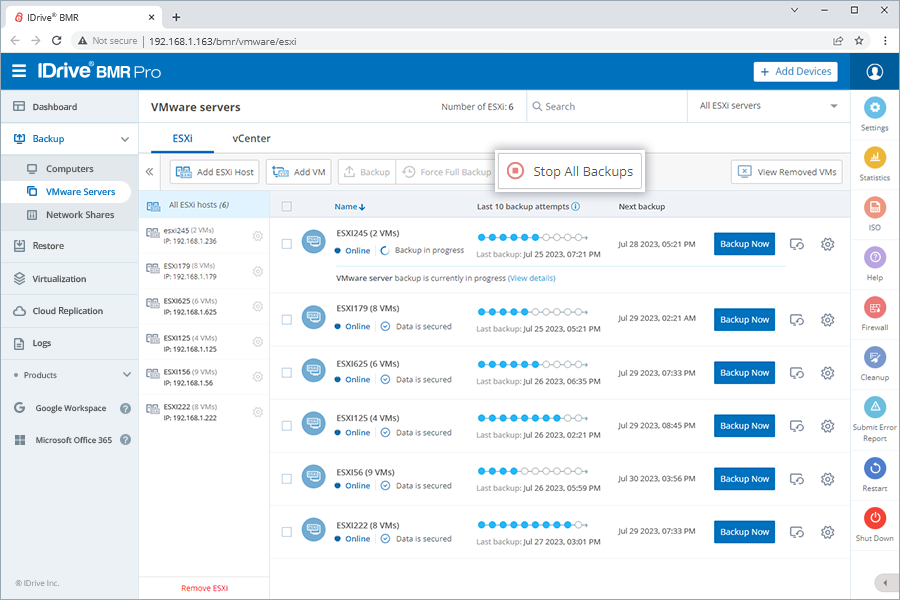
Click Stop All Backups.
Click Stop to confirm. All the ongoing backups will come to a halt and resume during the next scheduled backup.
Note: To stop backup for a specific VMware server, click Stop Backup corresponding to it.
Does IDrive BMR support VM backup after vMotion?
Yes, IDrive BMR continues the backup of added VMs after vMotion within the same or different vCenters.
Note: VM backup after vMotion between two different vCenters is supported only from version 9.2.0.
What is the maximum hard disk size of a VM that I can backup?
You can perform VMware backup of hard disks that are less than 2TB (2048GB) in size. For devices that are 2TB or larger, we recommend users to install the backup agent inside the VM. These backups will be displayed under Computers.
Can I change the backup schedule of VMs on my ESXi hosts and vCenter servers?
Yes, you can change the backup schedule of the virtual machines.
To reschedule VMware backup,
Connect to the IDrive BMR device interface.
Go to Backup > VMware Servers.
Click corresponding to the required VMware server under ESXi/vCenter. The Backup settings slider appears.
To edit the number of VMs for backup, click corresponding to Number of VMs.
Alternatively, enable Auto-discover new VMs in the server for backup to automatically detect and include any newly added VMs in the IDrive BMR backup list.
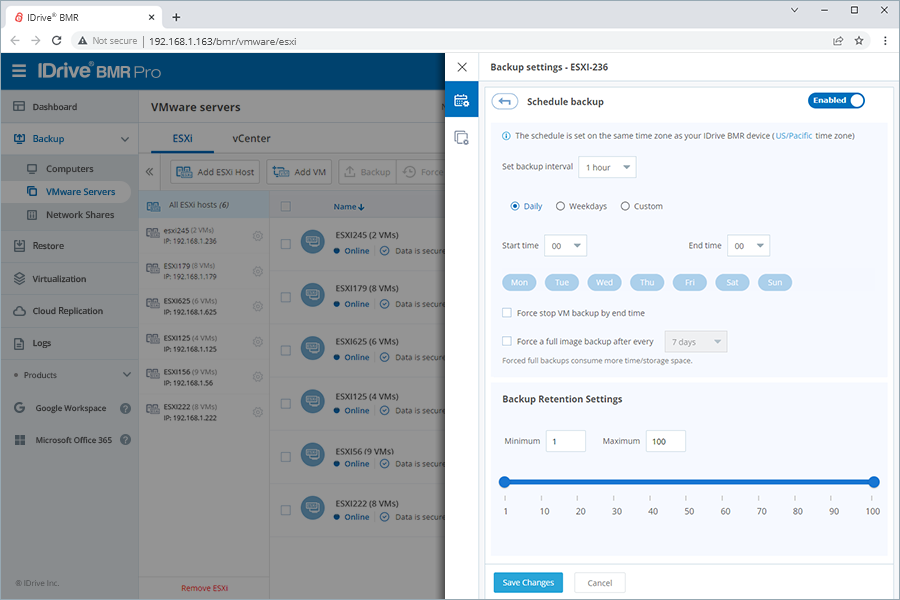
Click corresponding to the Backup schedule field.
Configure the backup interval, schedule, and retention settings. You can stop a VM backup by the specified end time. Set a frequency for forced full image backup, if required.
Note: You can enable/disable the schedule using the toggle Enabled/Disabled icon within the slider.
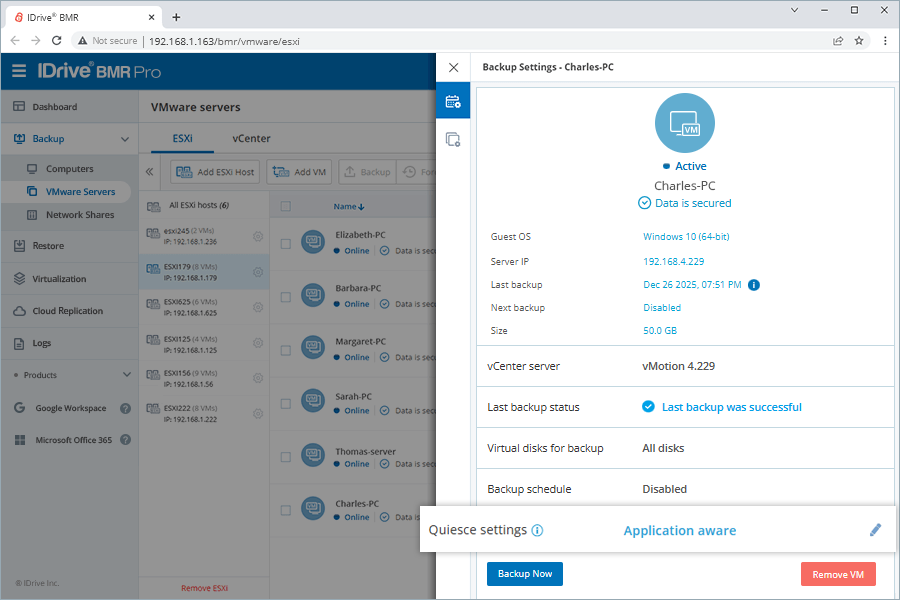
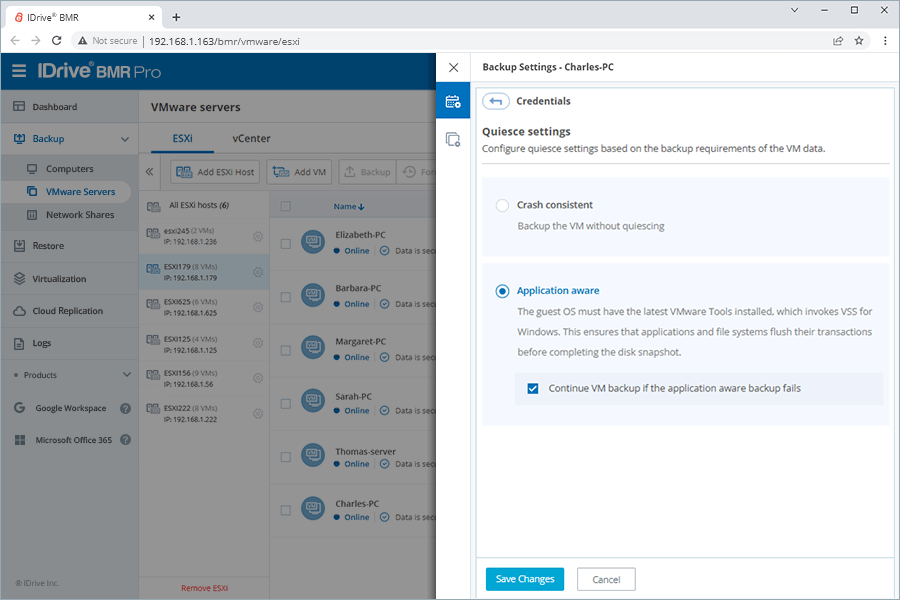
To control how VM data is captured during backup, click the next to Quiesce settings, and select the required option: Crash consistent or Application aware.
Click Save Changes. The backup settings will be updated.
How do I delete an ESXi host or vCenter server added for backup on the IDrive BMR device?
To delete an ESXi host or vCenter server from the IDrive BMR device,
Connect to the IDrive BMR device interface.
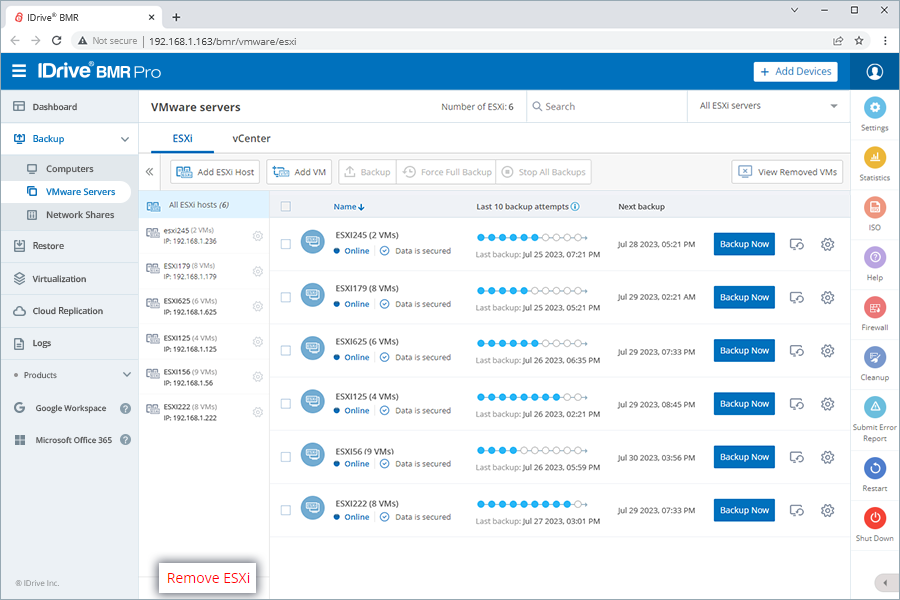
Go to Backup >VMware Servers.
Click Remove ESXi/Remove vCenter under ESXi/vCenter. Removing an ESXi host/vCenter server will move the server and associated VMs to the deletion queue.
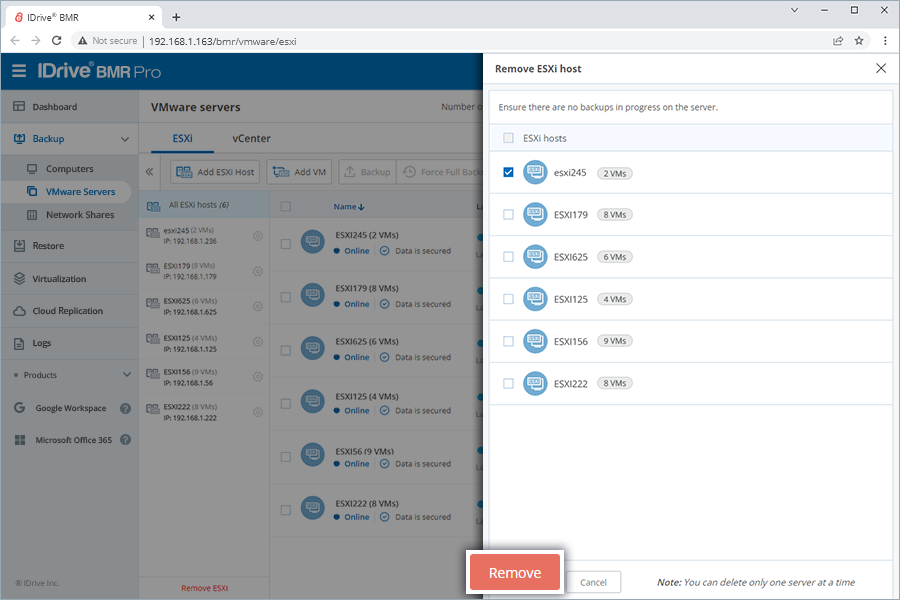
Select the VMware server to be deleted and click Remove. (You can delete only one server at a time.)
Click Remove in the confirmation window. The server and its VMs will be moved to the deletion queue.
Note: If any backup is in progress for the server, the server will not be deleted.
Alternatively, click corresponding to the VMware server and click Remove ESXi Host/Remove vCenter Server.
How do I restore the VMs to my ESXi host or vCenter server?
To restore a VM running on an ESXi host,
Connect to the IDrive BMR device interface.
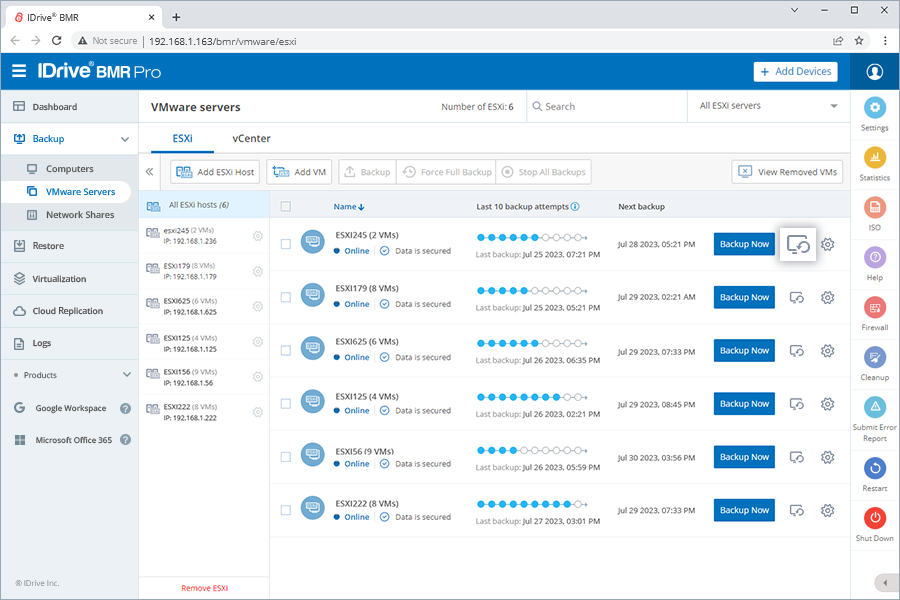
Go to Backup > VMware Servers.
Click corresponding to the required ESXi VM. You will be directed to VM restore, for the latest recovery point.
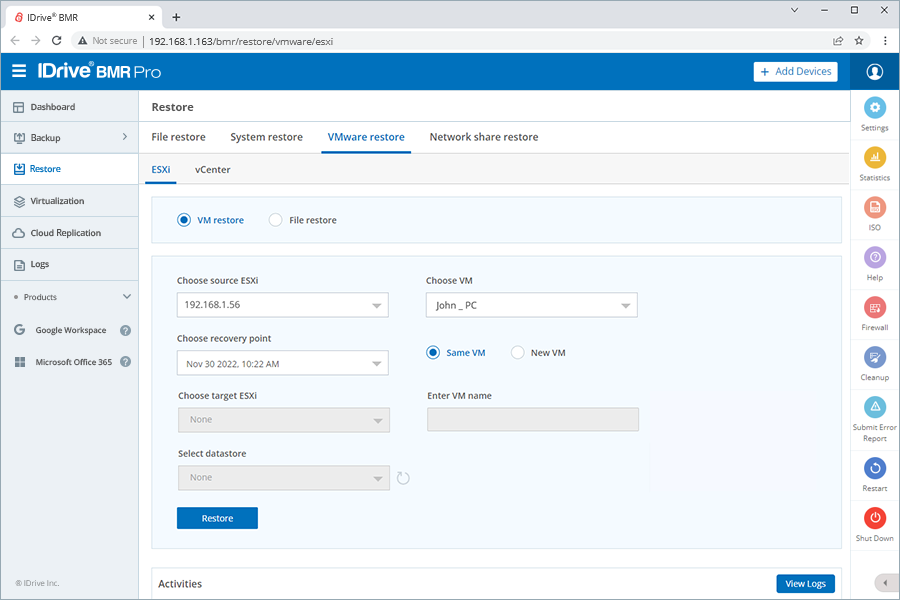
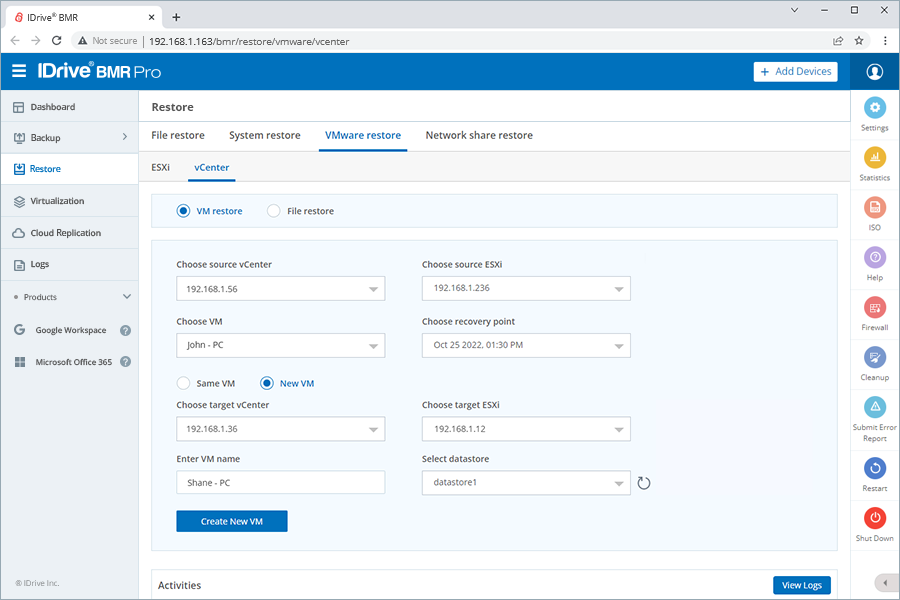
Alternatively, go to Restore > VMware restore > ESXi and select VM restore. Select the required source ESXi host, VM, and recovery point.
Note: Include the OS disk during backup to avoid any potential boot issues.
Select Same VM if you wish to restore data to the same VM.
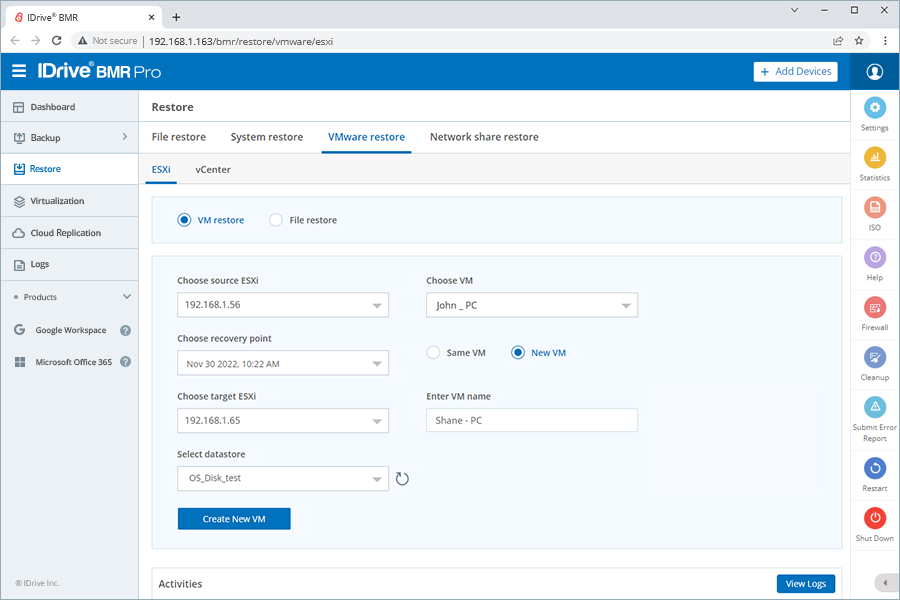
To restore data to another VM, select New VM, choose a target ESXi host for the new VM, enter a VM name, and select a datastore.
Note: IDrive BMR follows VMware's naming conventions and restrictions for virtual machines. Hence names with the special characters colon, quotation marks, and slash (:, ", \, and /) are not supported.
Click Restore/Create New VM to initiate the restore process. View restore progress in the Activities section below.
To restore a VM running on a vCenter server,
Connect to the IDrive BMR device interface.
Go to Backup > VMware Servers.
Click corresponding to the required vCenter VM. You will be directed to VM restore, for the latest recovery point.
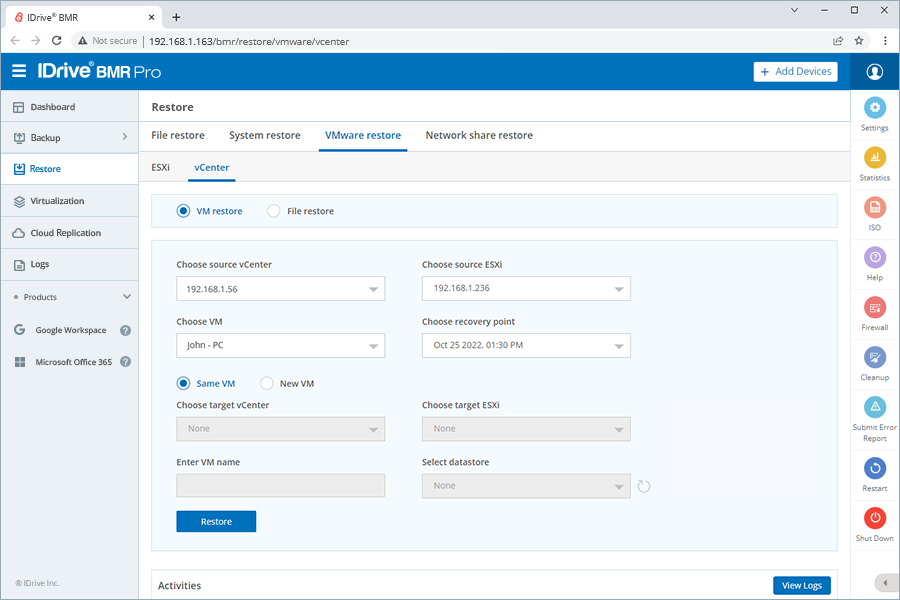
Alternatively, go to Restore > VMware restore > vCenter and select VM restore. Select the required source ESXi host, VM, and recovery point.
Note: Include the OS disk during backup to avoid any potential boot issues.
Select Same VM if you wish to restore data to the same VM.
To restore data to another VM, select New VM, choose a target vCenter server for the new VM, enter a VM name, and select a datastore.
Note: IDrive BMR follows VMware's naming conventions and restrictions for virtual machines. Hence names with the special characters colon, quotation marks, and slash (:, ", \, and /) are not supported.
Click Restore/Create New VM to initiate the restore process. View restore progress in the Activities section below.
Which versions of ESXi host are supported by IDrive BMR?
IDrive BMR supports ESXi server versions 5.5, 6.0, 6.5, 6.7, 7.0, and 8.0. We do not support free ESXi.
Does IDrive BMR support agentless backup for Hyper-V machines?
Since Hyper-V is a Windows machine, using IDrive BMR for backup allows you to protect all the VMs too. For a successful bare-metal
restore of the Hyper-V machines, ensure VMs are present locally on the same Hyper-V server machine during backup. For steps, refer to Does IDrive BMR support agentless backup for Hyper-V machines?
For which operating systems and file systems can I enable VMware file-level restore?
You can enable VMware file-level restore for the following operating systems:
Microsoft Windows
Linux
BSD, Solaris
Mac
Disk Types
RAID
FAT, FAT32
NTFS
ext2, ext3, ext4
ReiserFS
JFS
XFS
Btrfs
UFS
UFS2
HFS
HFS+
Basic and Dynamic disks are supported
Mirrored RAID volumes are supported. Since there are two disks with the same data,
both the VMDK images will be mounted for file restore.
Note:
Microsoft Windows:
ReFS is not supported.
Linux:
ZFS is not supported.
Linux LVM is supported; however, encrypted LVM volumes are not supported.
BSD, Solaris:
Limited support for variants of UFS, used in the following systems - SunOS, Sunx86, HP-UX, NeXTSTEP, OpenStep
RAID:
All other types of RAID configuration are not supported.
Striped volumes, and split volumes are not supported.
How do I restore individual files/folders from a source ESXi host/vCenter?
Restore individual files/folders, irrespective of the operating system used on the VM. All major file systems on the VM are also supported.
To restore individual files/folders from a source ESXi host/vCenter,
Go to Restore > VMware restore > ESXi/ vCenter.
Select the File restore radio button.
Select the required source ESXi host/vCenter server and the target ESXi host you want to restore.
Select a VM and the required recovery point.
Choose the mount username and enter the password.
Click Create Restore Path to initiate the restore process. You can view the restore path and related details in the Mount summary section.
Which operating systems are supported by IDrive BMR VMware backup?
IDrive BMR is compatible with all operating systems and therefore supports VM backups running on any VMware server, irrespective of the OS.
I got the following error message during VM backup: “An error occurred while taking a snapshot: Failed to quiesce the virtual machine.” What should I do?
You are getting this error message due to an issue with the virtual machine's configuration.
The possible causes of this issue include:
As per VMware KB 2069952, the Virtual Disk service does not start in the Windows guest operating system on the affected
virtual machine.
If you face this issue,
Sign in to the Windows operating system as an administrator.
Click Start, type services.msc, and click Enter.
Right-click the Virtual Disk service and click Start.
As per VMware KB 1018194, this issue occurs when the I/O in the virtual machine is high and the quiescing operation is
unable to move all the data to the disk, while further I/O is created.
Follow the resolutions mentioned in this VMware article to complete the VM backup:
When the virtual machine does not have any free space, you may receive this error message. Free up some space on the virtual
machine to address this concern.
Other VMware KBs related to creating snapshot failure:
Follow the resolutions mentioned in the respective VMware articles to address these issues and complete the VM
backup.
How can I avoid adding multiple ESXi hosts?
You don't have to add every single ESXi host to initiate backups. You can add the relevant vCenter servers and all the associated
ESXi hosts will be automatically added too for backup.
When will cleanup for VMware machines take place?
The cleanup for VMware machines will follow the same cleanup schedule specified for your computers.
Can I manually delete the recovery points of my VMware machines?
Yes, you can manually delete the recovery points of your VMware machines.
To view and manage recovery points of a VMware machine,
Connect to the IDrive BMR device interface.
Go to Backup > VMware Servers.
Click corresponding to the specific VMware server under ESXi/vCenter. The Backup settings slider appears.
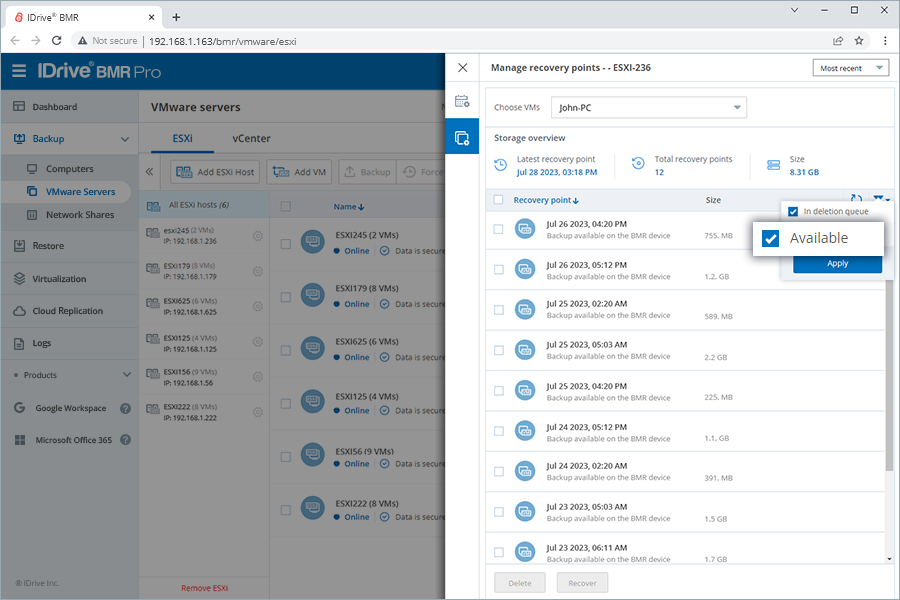
Click . The Manage recovery points screen appears listing out the recovery points of VMs of the selected ESXi/vCenter server.
Use the filter to view Available recovery points.
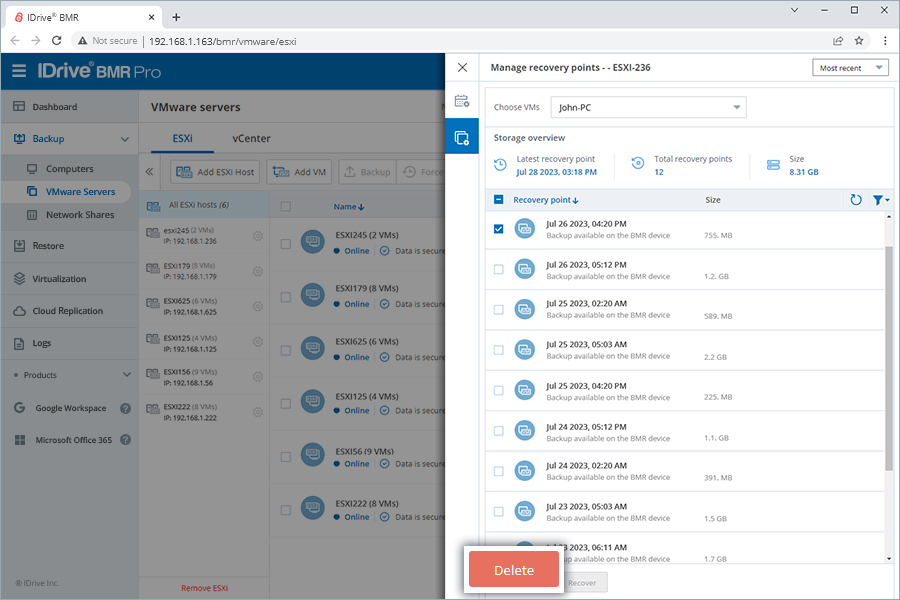
Select the recovery point(s) you wish to delete and click Delete. Alternatively, click the corresponding to a recovery point to delete it. These recovery points will be queued for deletion and permanently removed from the IDrive BMR device in the order they are added to the queue.
Note: Click the Refresh to view the latest status of the recovery points.
Until a recovery point is deleted, you can recover it from the deletion queue. Set the filter to In deletion queue, select the required recovery points, and click . Alternatively, set the filter to In deletion queue and click the corresponding to a recovery point to delete it permanently.


 . Alternatively, set the filter to In deletion queue and click the