IDrive offers Synology backup as a paid add-on. Enable it to use IDrive's secure and immutable cloud storage with Synology's native applications like Hyper Backup and Cloud Sync. This allows you to easily configure and automate backup and real-time replication between your Synology NAS and the IDrive cloud.
Benefits of IDrive Synology Backup:
Flexibility to schedule backups and real-time replication jobs for continuous data protection.
Access your backed-up Synology NAS data from any device, anytime—whether you're in the office or on the go.
Easily scale your storage as your data grows, without worrying about running out of space.
Store your data in a region closer to you to ensure faster, more reliable access and quick recovery.
How do I enable Synology Backup in IDrive®?
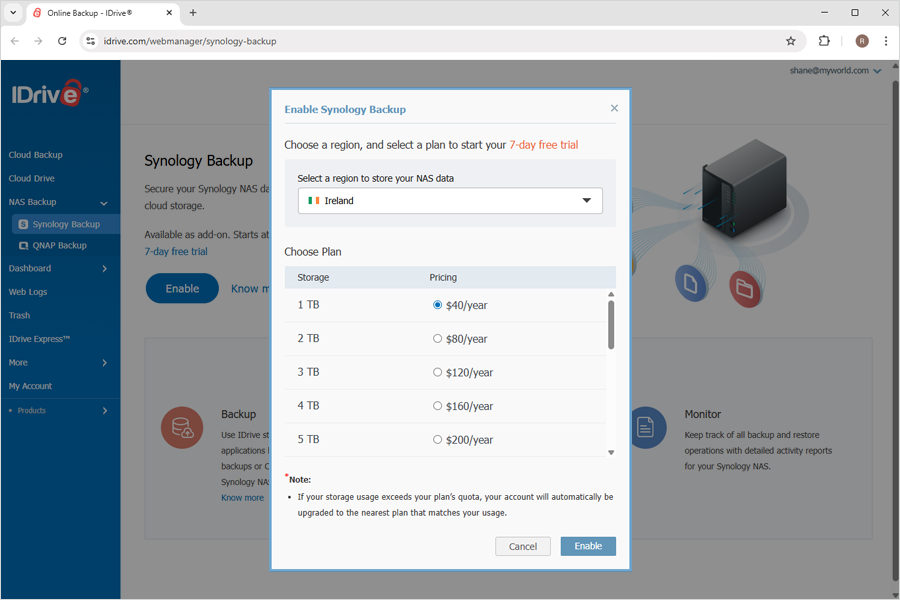
To enable Synology Backup in IDrive,
Sign in to your IDrive account.
Navigate to 'NAS Backup' > 'Synology Backup'.
Click 'Enable'.
Select a region and a plan and click Enable.
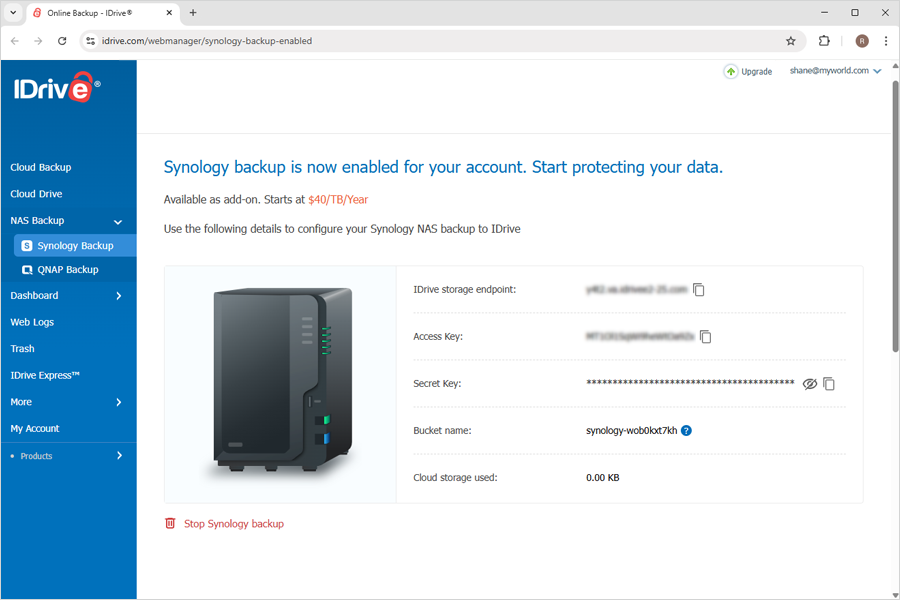
Use the generated IDrive storage endpoint, secret and access keys for adding IDrive storage as a destination in Hyper Backup or Cloud Sync.
How do I create a backup job to IDrive® in Synology Hyper Backup?
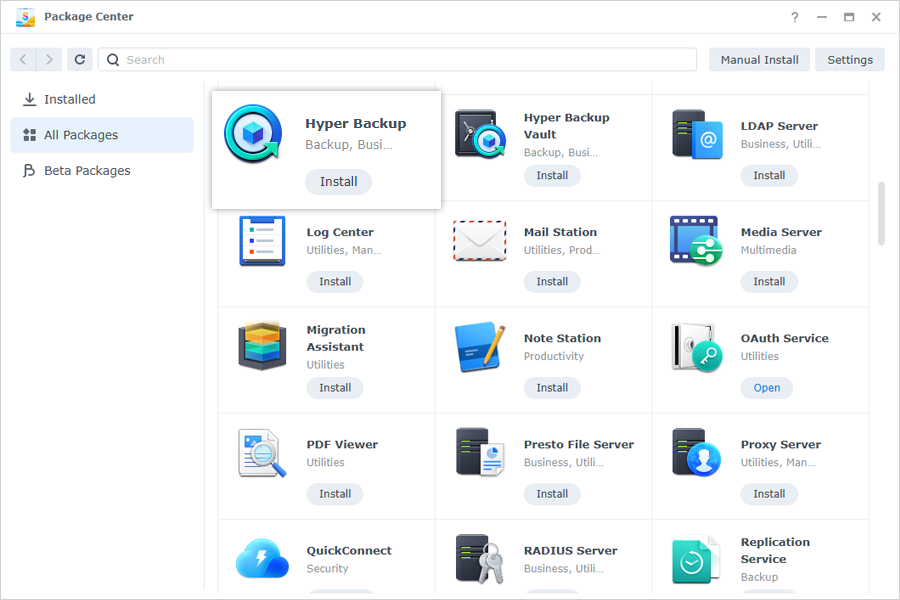
Open 'Package Center' on your Synology NAS.
Search for 'Hyper Backup' and install it.
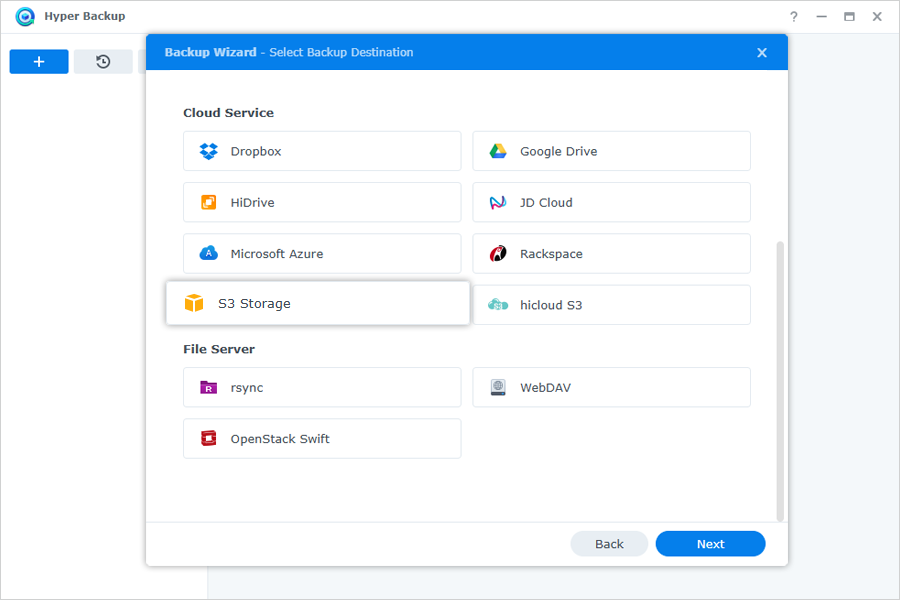
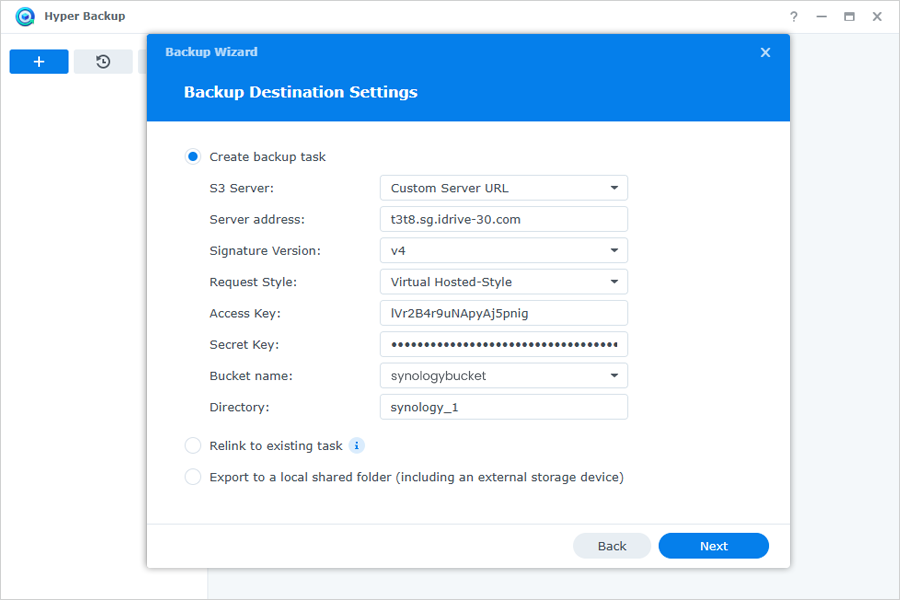
Launch 'Hyper Backup' and select 'S3 Storage' as the backup destination.
From the 'S3 Server' dropdown, choose 'Custom Server URL'.
Enter your IDrive access key, secret key, and IDrive storage endpoint.
Click 'Next'.
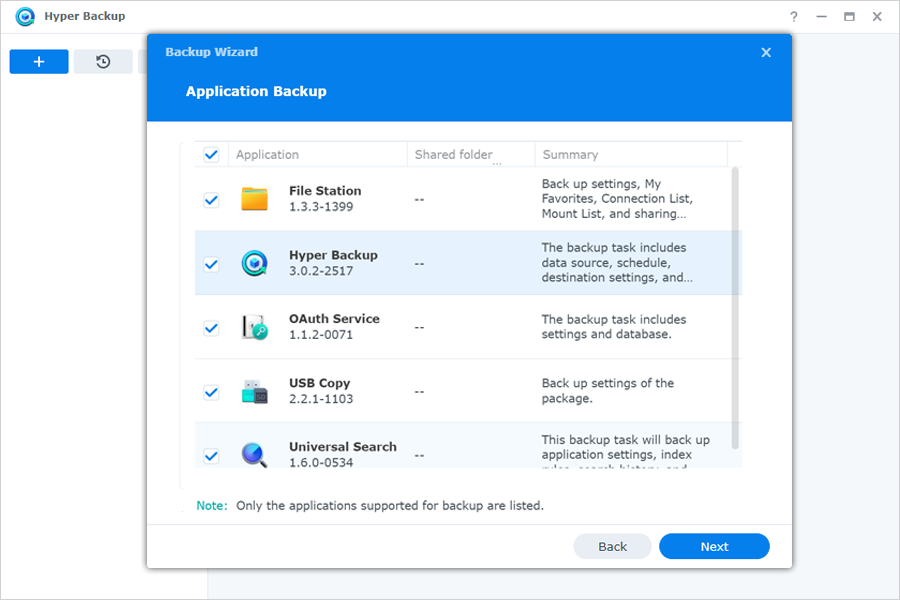
Choose the folders you want to back up.
You can also select applications to include in the backup.
Click 'Next' to proceed.
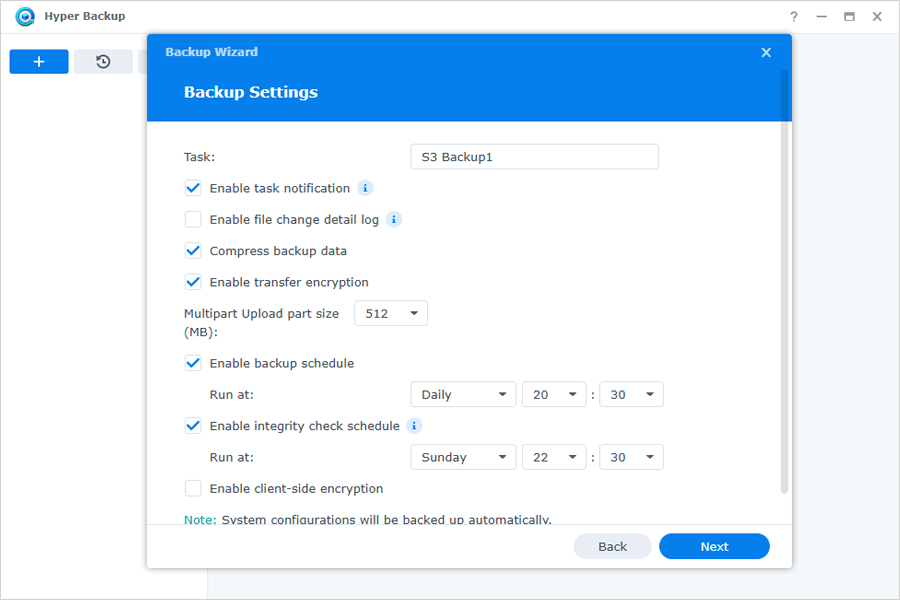
Set a backup schedule based on your needs.
Adjust other backup settings as required.
Select the versioning option if needed.
Click 'Done'.
Confirm the backup in the 'Back Up Now' popup.
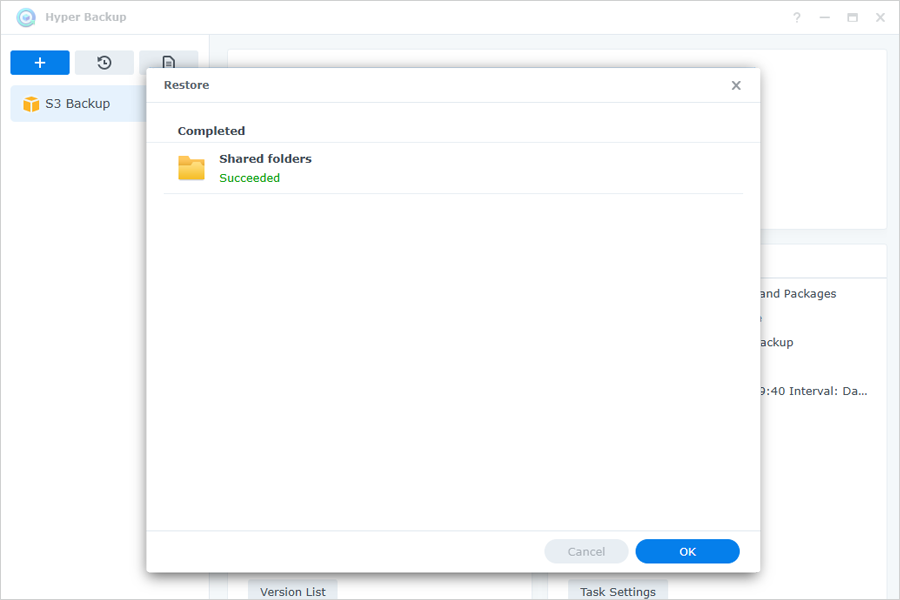
How do I restore data from IDrive® to my Synology device via Hyper Backup?
To restore Synology NAS data from IDrive via Hyper Backup,
Open 'Package Center' on your Synology NAS.
Launch 'Hyper Backup'
Click .
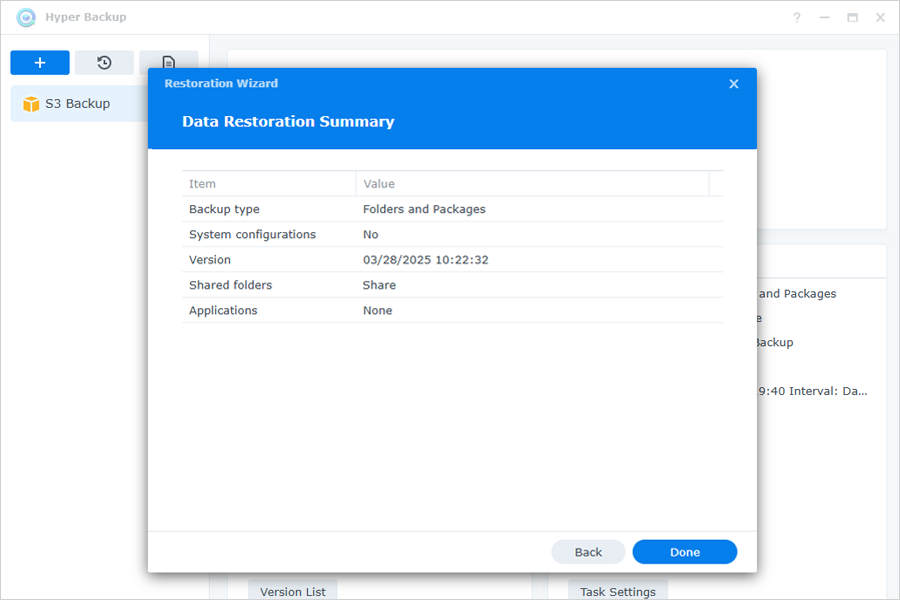
In the 'Restoration Wizard', select a 'Restoration Type', and click 'Next'.
Select the required one from the list of all associated backup jobs as the restoration task, and click 'Next'.
Choose if you want to restore system configurations, and click 'Next'.
Verify the details in the summary, and click 'Done'.
Data will be restored to the original or specified location on the Synology NAS device.
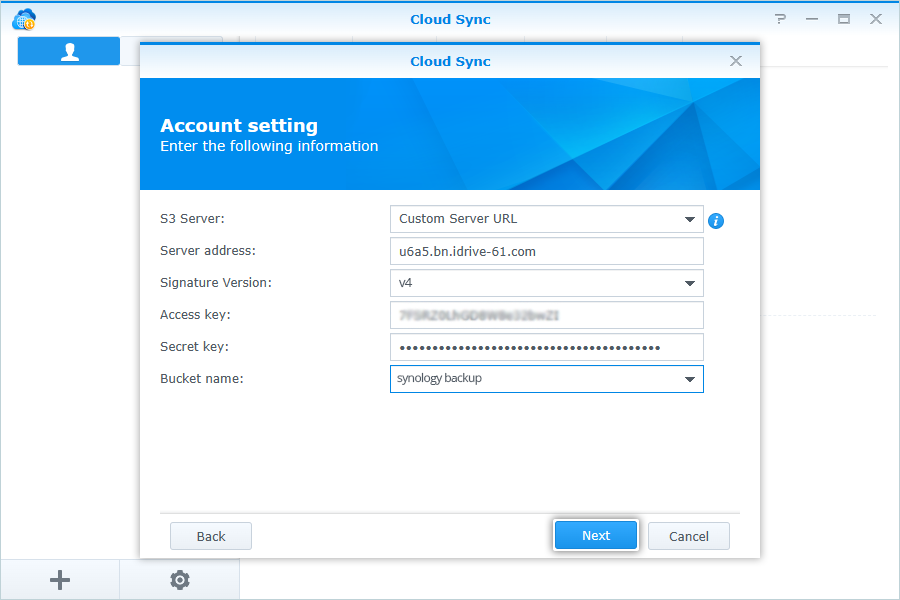
How do I set up Synology Cloud Sync with IDrive®?
To set up Synology Cloud Sync with IDrive®
Download Synology Cloud Sync from the Synology Package Center and install it.
Open Synology Cloud Sync.
Select 'S3 Storage' as 'Cloud Provider'.
In 'Account Settings', enter the following details
Select 'Custom Server URL' as 'S3 Server'.
Enter your 'IDrive storage endpoint' as the 'Server Address'.
Enter your 'IDrive Access Key' as the 'Access Key'.
Enter your 'IDrive Secret Access Key' as 'Secret Key'.
Select the 'Bucket name' from the dropdown.
Click 'Next'.
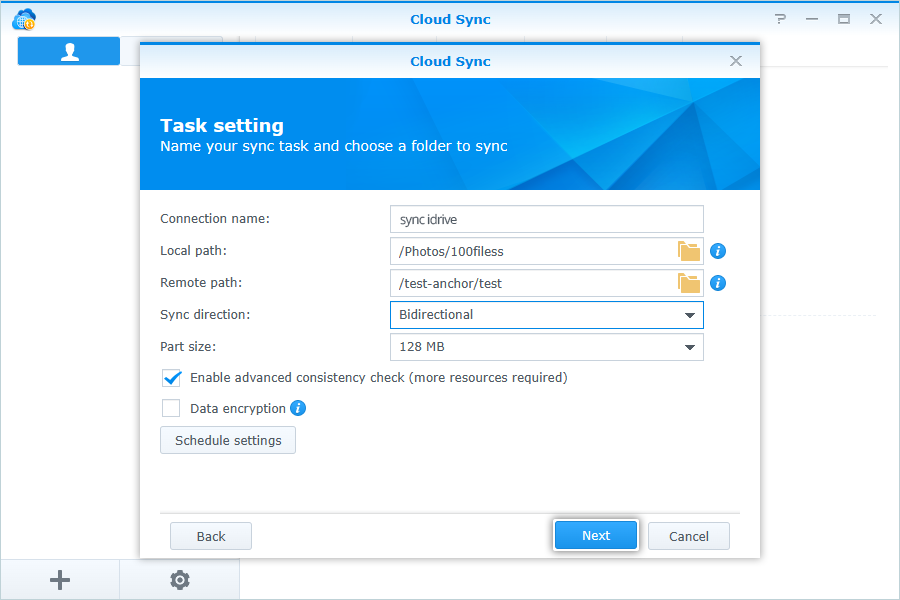
In 'Task Settings', enter the following details:
Enter a name for 'Connection'.
Select the 'Local path' from your NAS Storage.
Select the 'Remote path' from your IDrive bucket.
Select 'Sync direction' (Default: Bidirectional).
Click 'Next'.
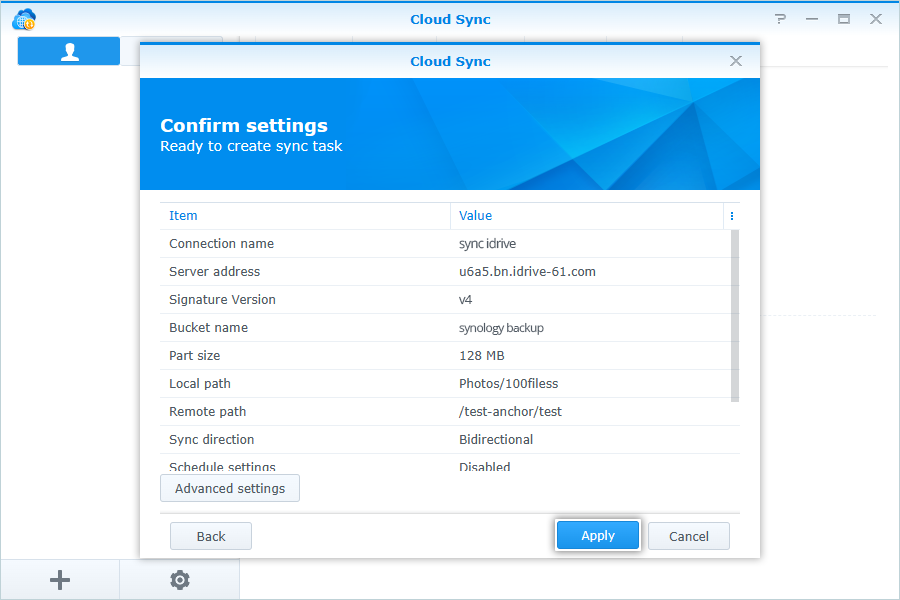
Click 'Apply' to confirm 'Task Settings'.
After connection, auto-sync will start, and all the files from the Local path of your Synology NAS storage will be synced to IDrive and vice versa.
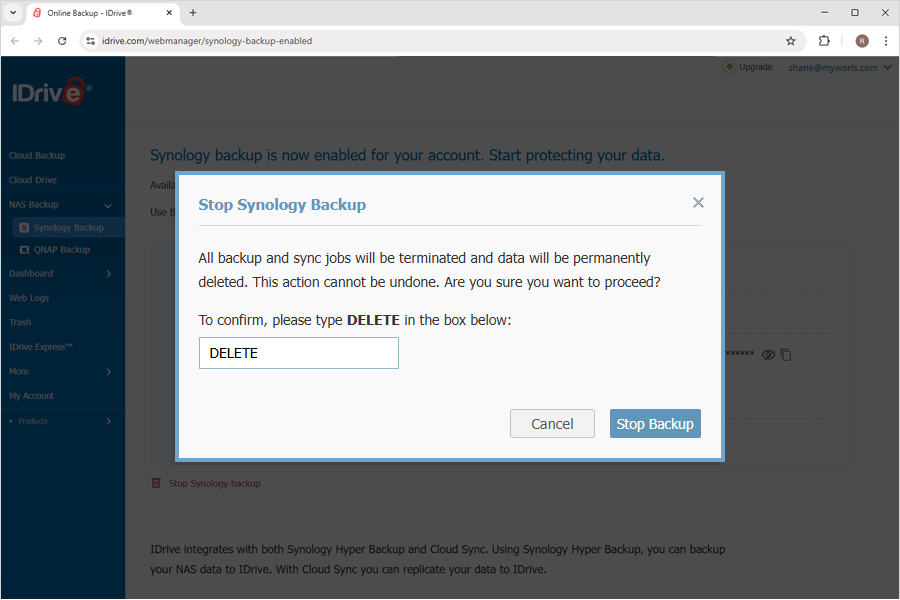
How do I stop Synology Backup to IDrive®?
Sign in to your IDrive account.
Navigate to 'NAS Backup' > 'Synology Backup'.
Click 'Stop Synology Backup'.
Provide confirmation in the popup.
Click 'Stop Backup'.
All backup jobs will be terminated and the Synology data will be permanently deleted from your IDrive account.